There are not too many options for radio amateurs who want portable DC power beyond the batteries in their devices. The Off Grid Ham 100 Watts For $300 Solar Power Plant is one alternative, but that can be too much for the ham who only needs to run a handheld/QRP radio or a cellphone off the grid for a weekend or so. I’ll take you through a very easy one-afternoon project that will give you enough juice to operate your handheld radios & other light electronics for a long time without draining your wallet. Welcome to the Off Grid Ham DIY portable DC power pack.
The Problem.
Light duty portable DC power for ham radio is somewhat hard to come by. There are the effective but quite expensive “solar generators” that do not deliver enough energy to justify their price tags. I’ve also seen hams use automotive “jump boxes” that are great for jump starting cars but are not particularly well suited for ham radio purposes.
I don’t know why a decent, affordable, ham radio-specific DC battery box does not exist on the commercial market, but there is definitely a void out there. This project will fill that void, and like all Off Grid Ham DIY projects, it respects your wallet.
The Portable DC Power Pack Project Overview: Two Options.
The Off Grid Ham DC power pack can be made in two configurations. The first is a “budget model” that will cost about $50. The second uses a West Mountain Radio Rig Runner which offers ease of construction and a cleaner appearance. Version 2 will cost about $110. Both have a 5 amp-hour SLA battery. The entire system weighs only a few pounds and is completely contained in a small, easy to carry plastic case.
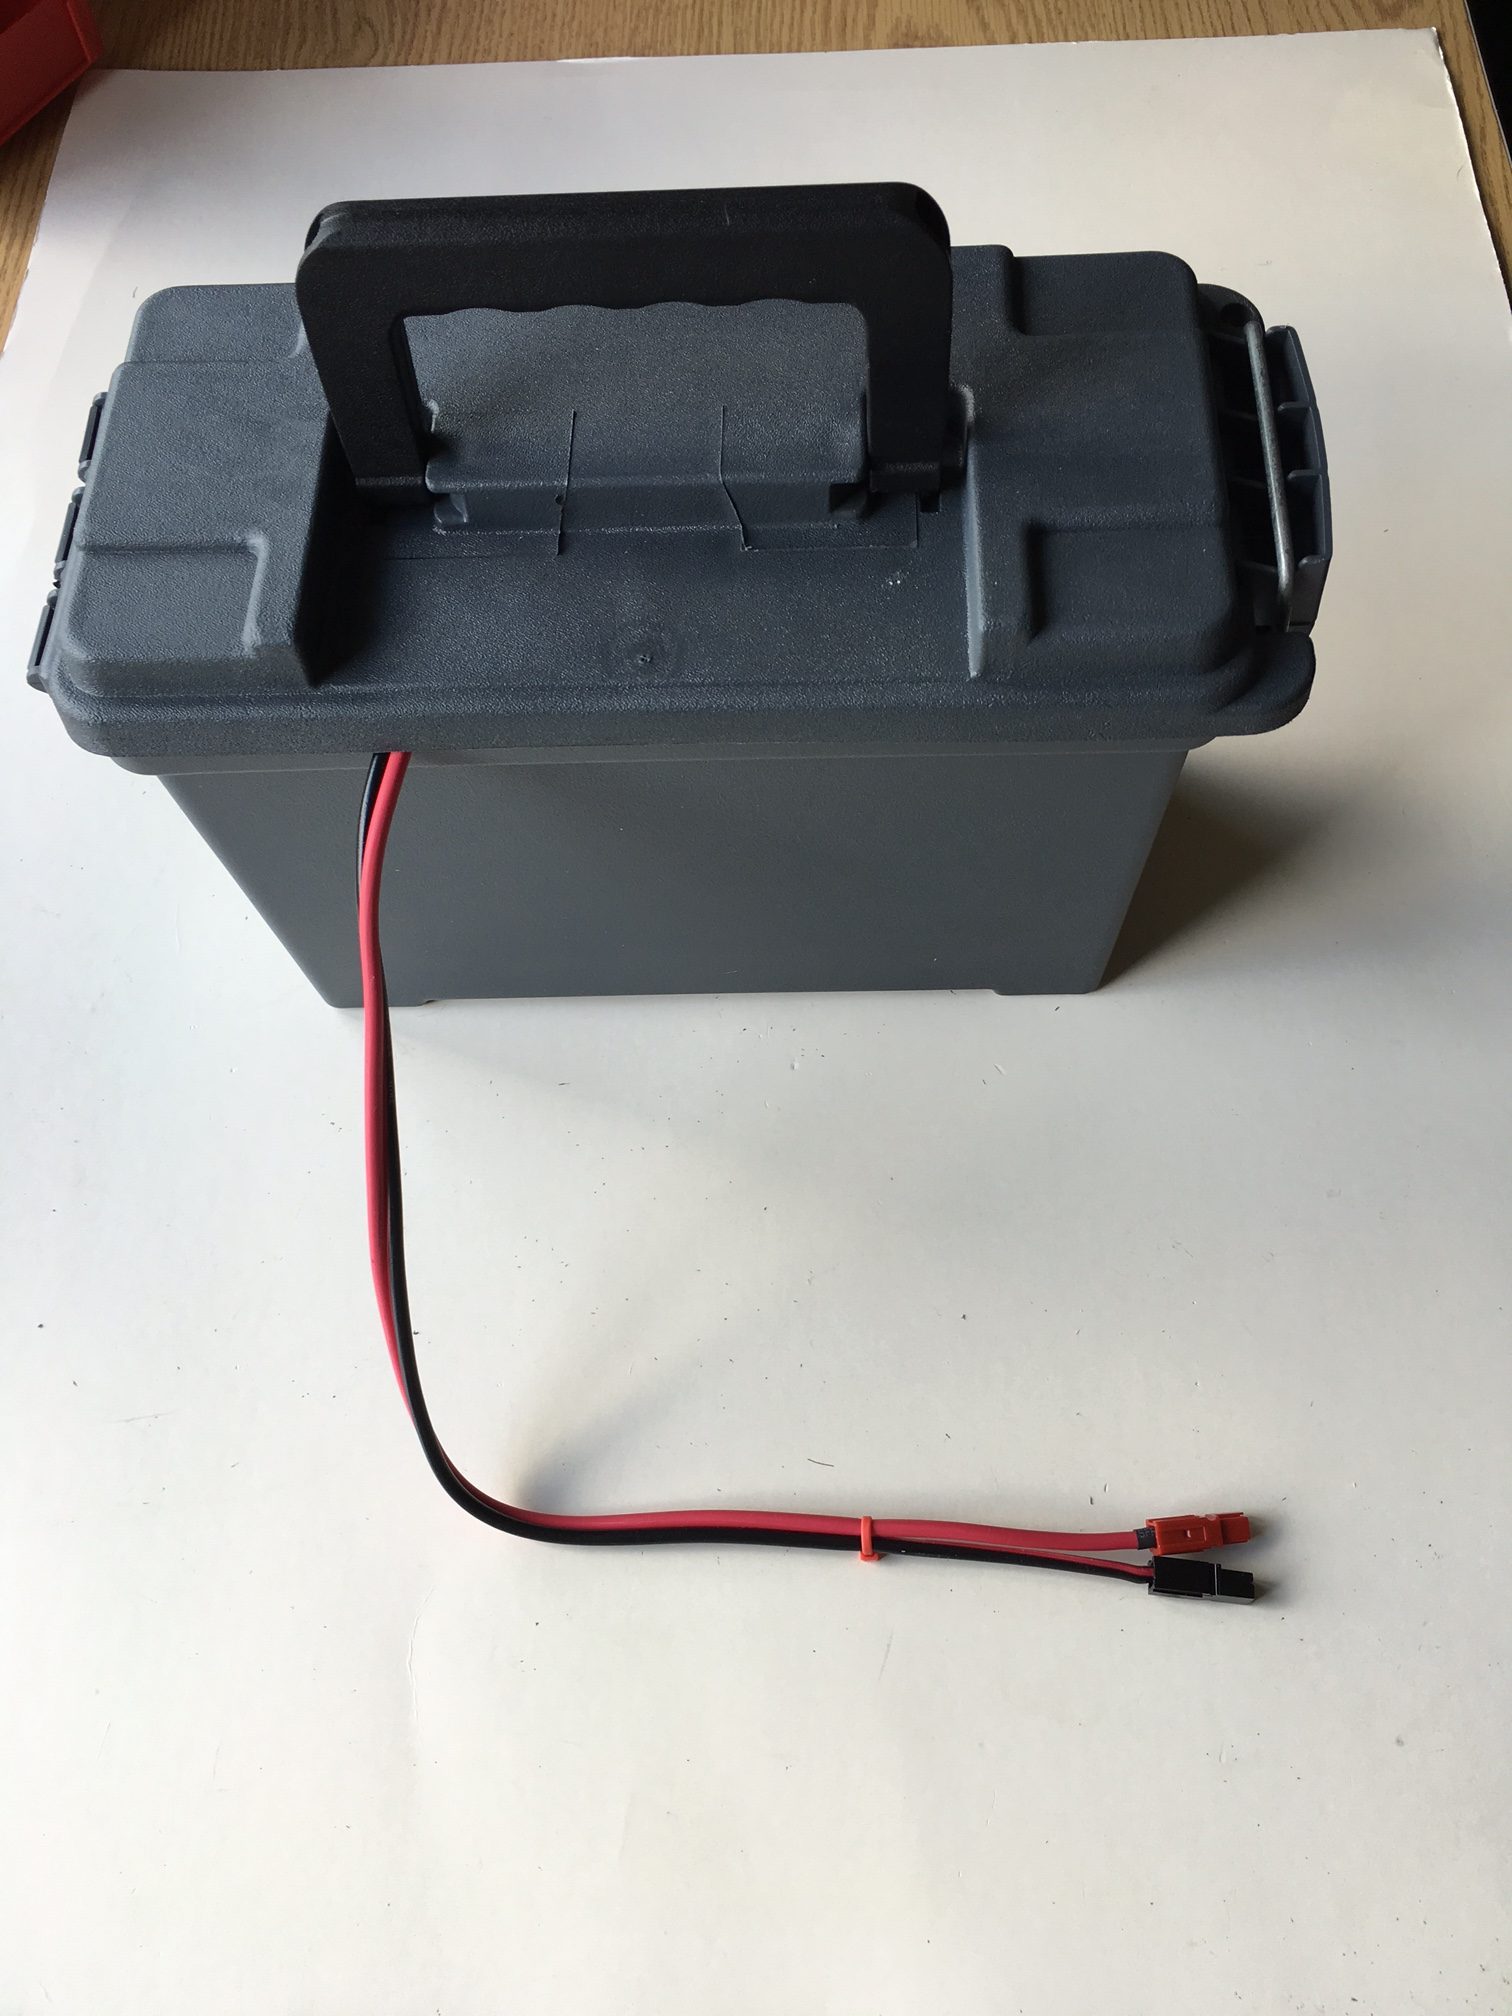
Photo 1A. Off Grid Ham original photo ©2015
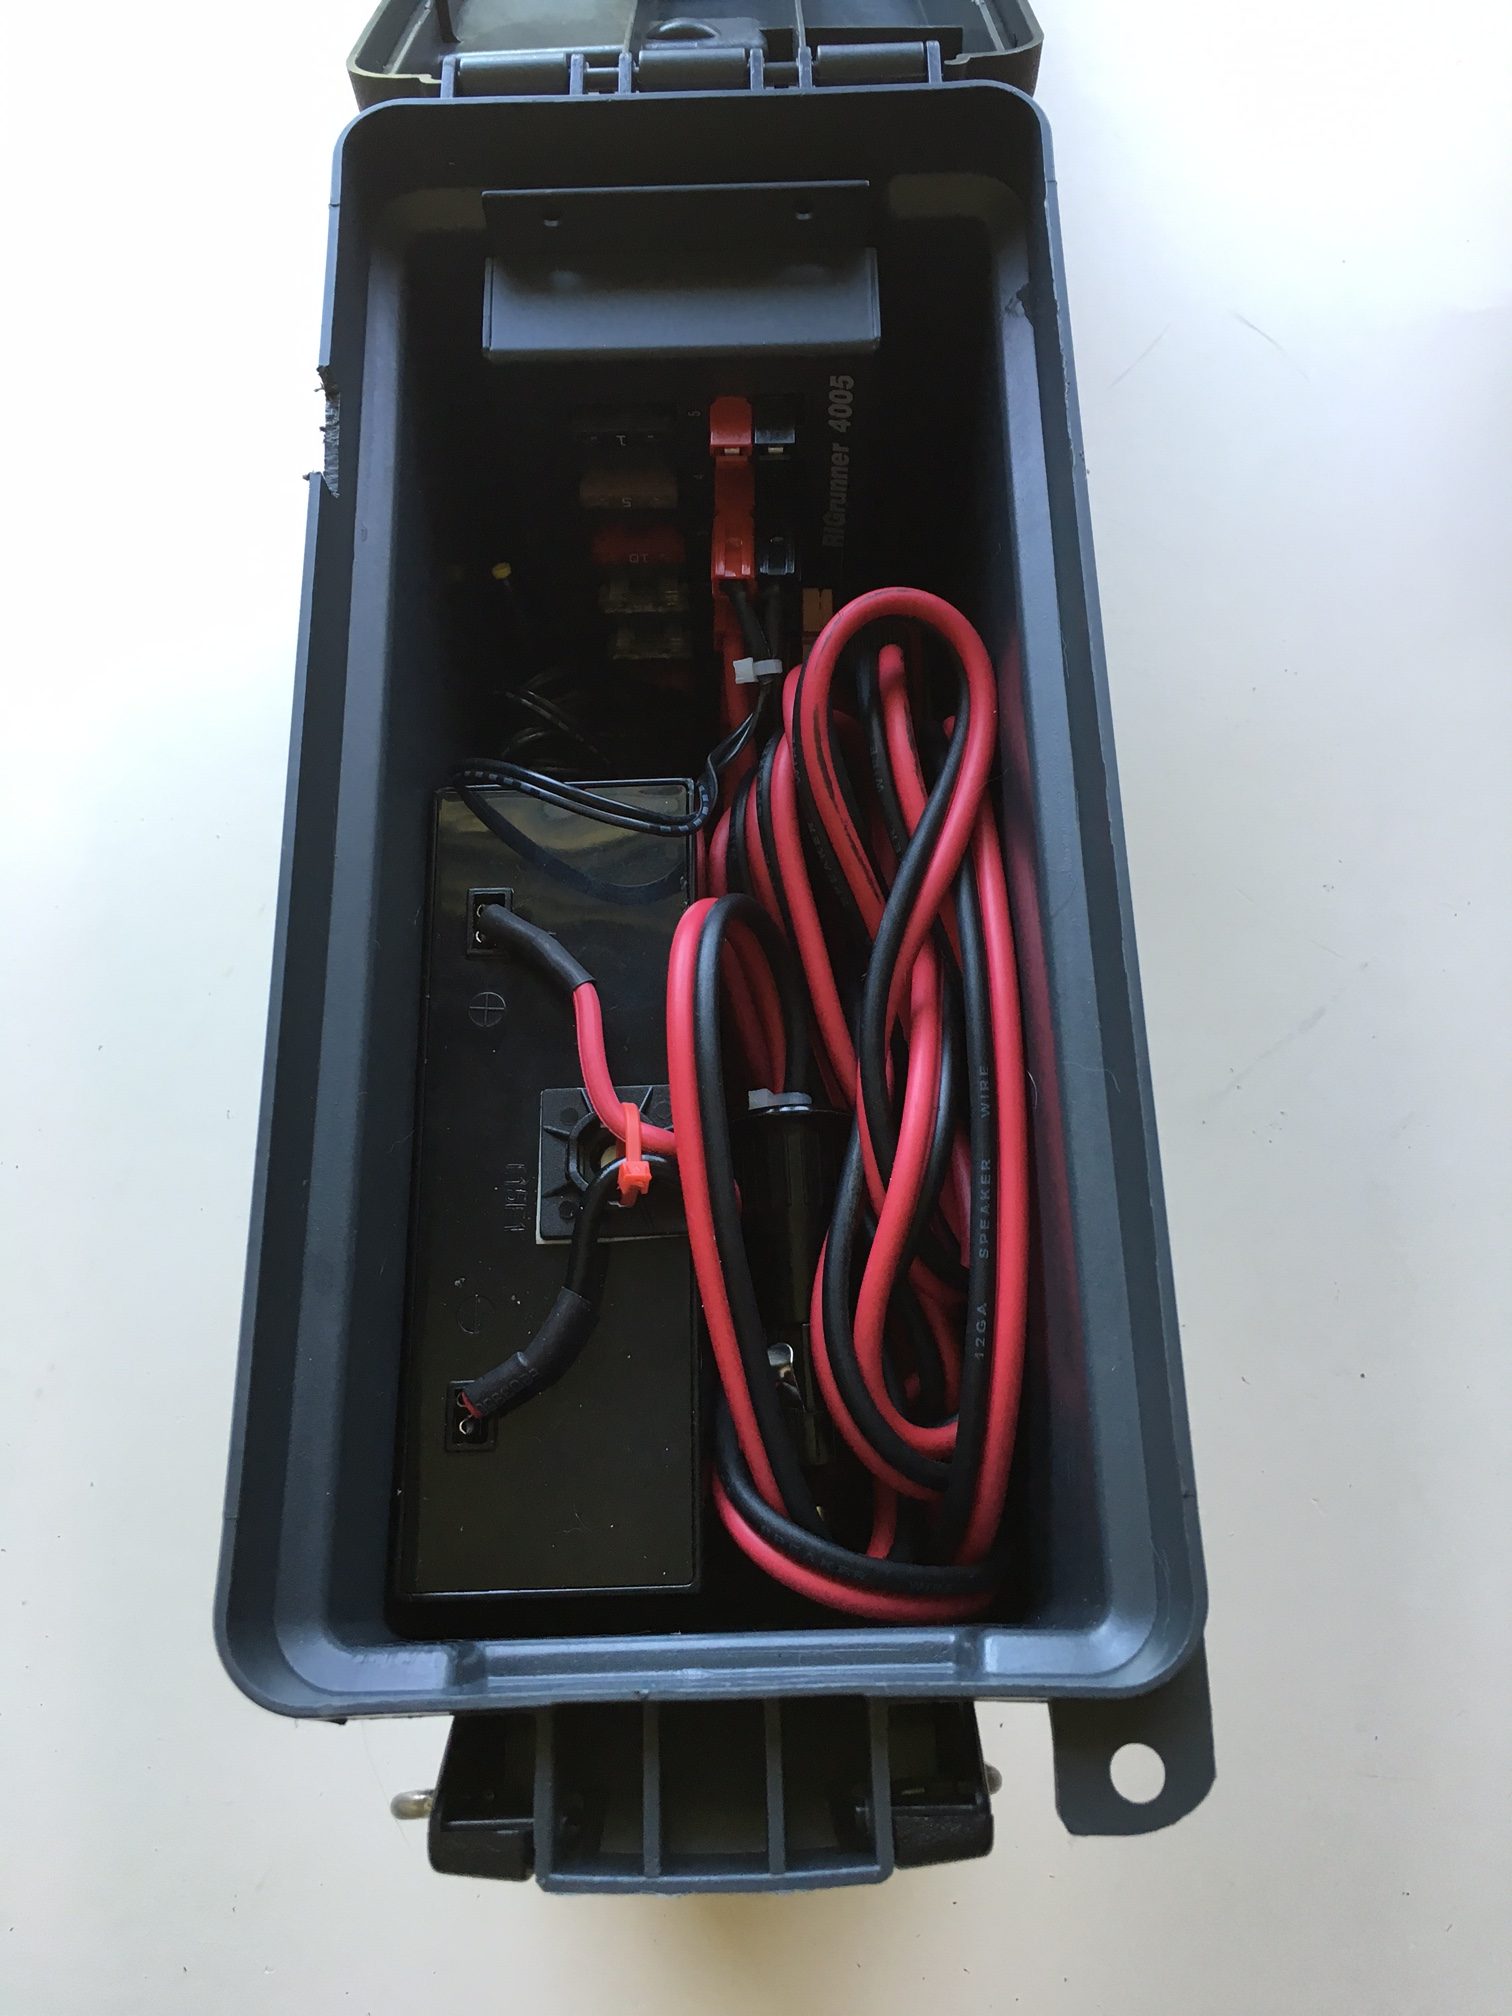
Photo 1B. Off Grid Ham original photo ©2016
Photos 1A and 1B above are the finished version 2 DC power pack. All the wires and components fit neatly into the case. You can arrange the components to fit your taste. Batteries come in different shapes so your results may vary from mine.
Parts List–Budget Version 1
Plastic ammo box $7.99 from Harbor Freight –these are often on sale for much less and are sometimes given away free as a promotion.
Automotive DC distribution block $10.00 from Advance Auto
5 amp-hour SLA battery $14.97 from Amazon
12 volt automotive male lighter plug $5.00, available almost anywhere (auto parts store, Walmart, etc.)
Assorted wire, fuses, connectors, sales taxes, shipping fees: $12.04.
You will also need a busbar or some common point to connect the negative side of each circuit back to the battery. This feature is built into the Rig Runner in version 2, but an automotive fuse panel has no negative terminal because the car frame is used for this purpose. Therefore, you will have to make your own common negative. In my example (photo 2, below) I used a bar intended for a 120 volt breaker panel but any kind of terminal strip will do.
VERSION 1 TOTAL= $50.00-$55.00
Parts List –Upgraded Version 2.
Use all of the parts from version 1 except replace the automotive DC block and the busbar with a Rig Runner 4005 $69.00 from West Mountain Radio Note: The 4005 comes with fuses.
MFJ also makes similar devices.
VERSION 2 TOTAL= $100-$110.00
Construction.
Putting the DC power pack together is about as basic as it gets. Cut each wire to size and make your connections. You do not want a jumbled up mess in the box, but leave enough slack to remove the components for servicing.
Connect the wires from the positive and negative of the battery to the respective terminals on the automotive DC block or Rig Runner. Cut a notch in the edge of the case for the wires so you can close the lid when using the DC power pack.
Use Velcro to hold the battery and DC block in place. Make everything neat and organized. Slop is not acceptable.
Important: If you are doing Version 1 with the automotive DC block, be sure to include a fuse on the battery as close to the positive terminal as possible. There are exposed conductors on the DC block that can create a short circuit that will not be protected by the fuses on the block.
A battery fuse with the Rig Runner is nice to have but not required since each branch connection is fused anyway and there are no exposed contacts.
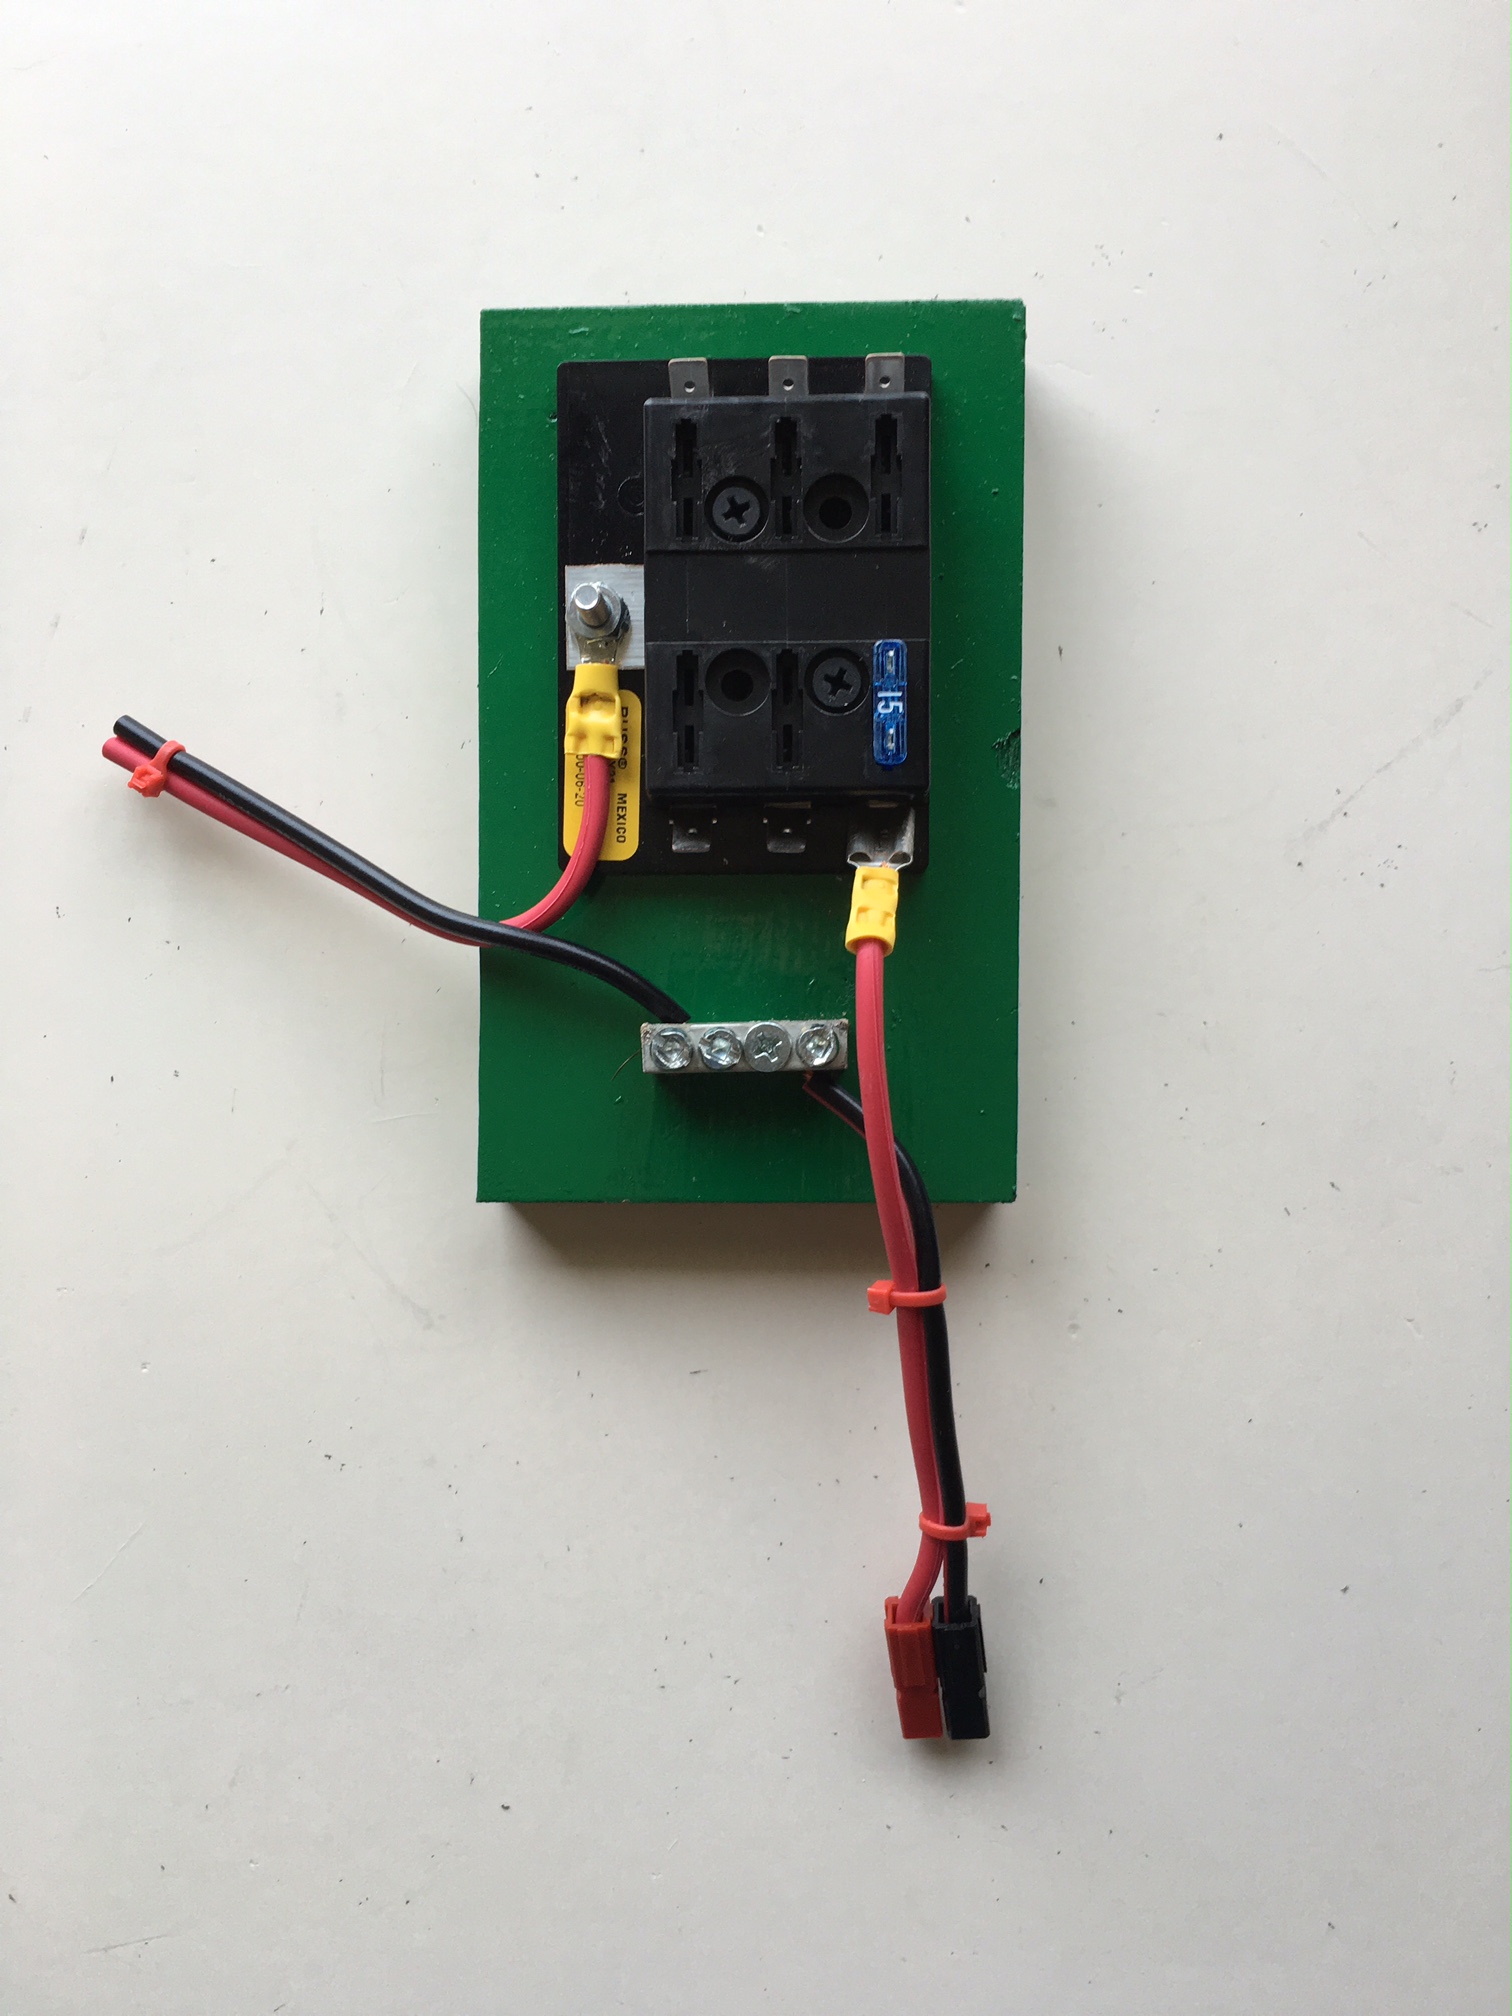
Photo 2. Off Grid Ham original photo ©2016
Photo 2 above shows the correct wiring method for the budget version DC power block. I call it a “poor man’s Rig Runner”. This example has only one branch circuit installed but will acommodate up to six. The black and red wires off to the left connect to the battery.
Using the DC Power Pack.
The power is accessed from the connection points on the power block or Rig Runner. At minimum you will probably want a male 12 volt cigarette lighter plug (to charge the battery) and a 12 volt female cigarette lighter receptacle (to plug your equipment in). You may also want to add other specialty plugs for whatever equipment you have. How many and what kind of plugs is an individual choice, but with six connection points you can have pretty much whatever you want. Cut a notch in the plastic to run the power cords through; this way the lid can be closed while the DC power pack is in use.

Photo 3. Off Grid Ham original photo ©2016
Photo 3 shows the placement of the Rig Runner in the case (the battery was removed for the photo). It is held in place with Velcro. If you are going with the budget DC automotive block version, it will fit in the same space. If desired, you can drill holes in the case and mount the Rig Runner/DC block with nuts and bolts.
Photo 4 below is the assorted custom power cords I made for my equipment. They all store neatly inside the case. They are easy to make so be sure to have a variety on hand.
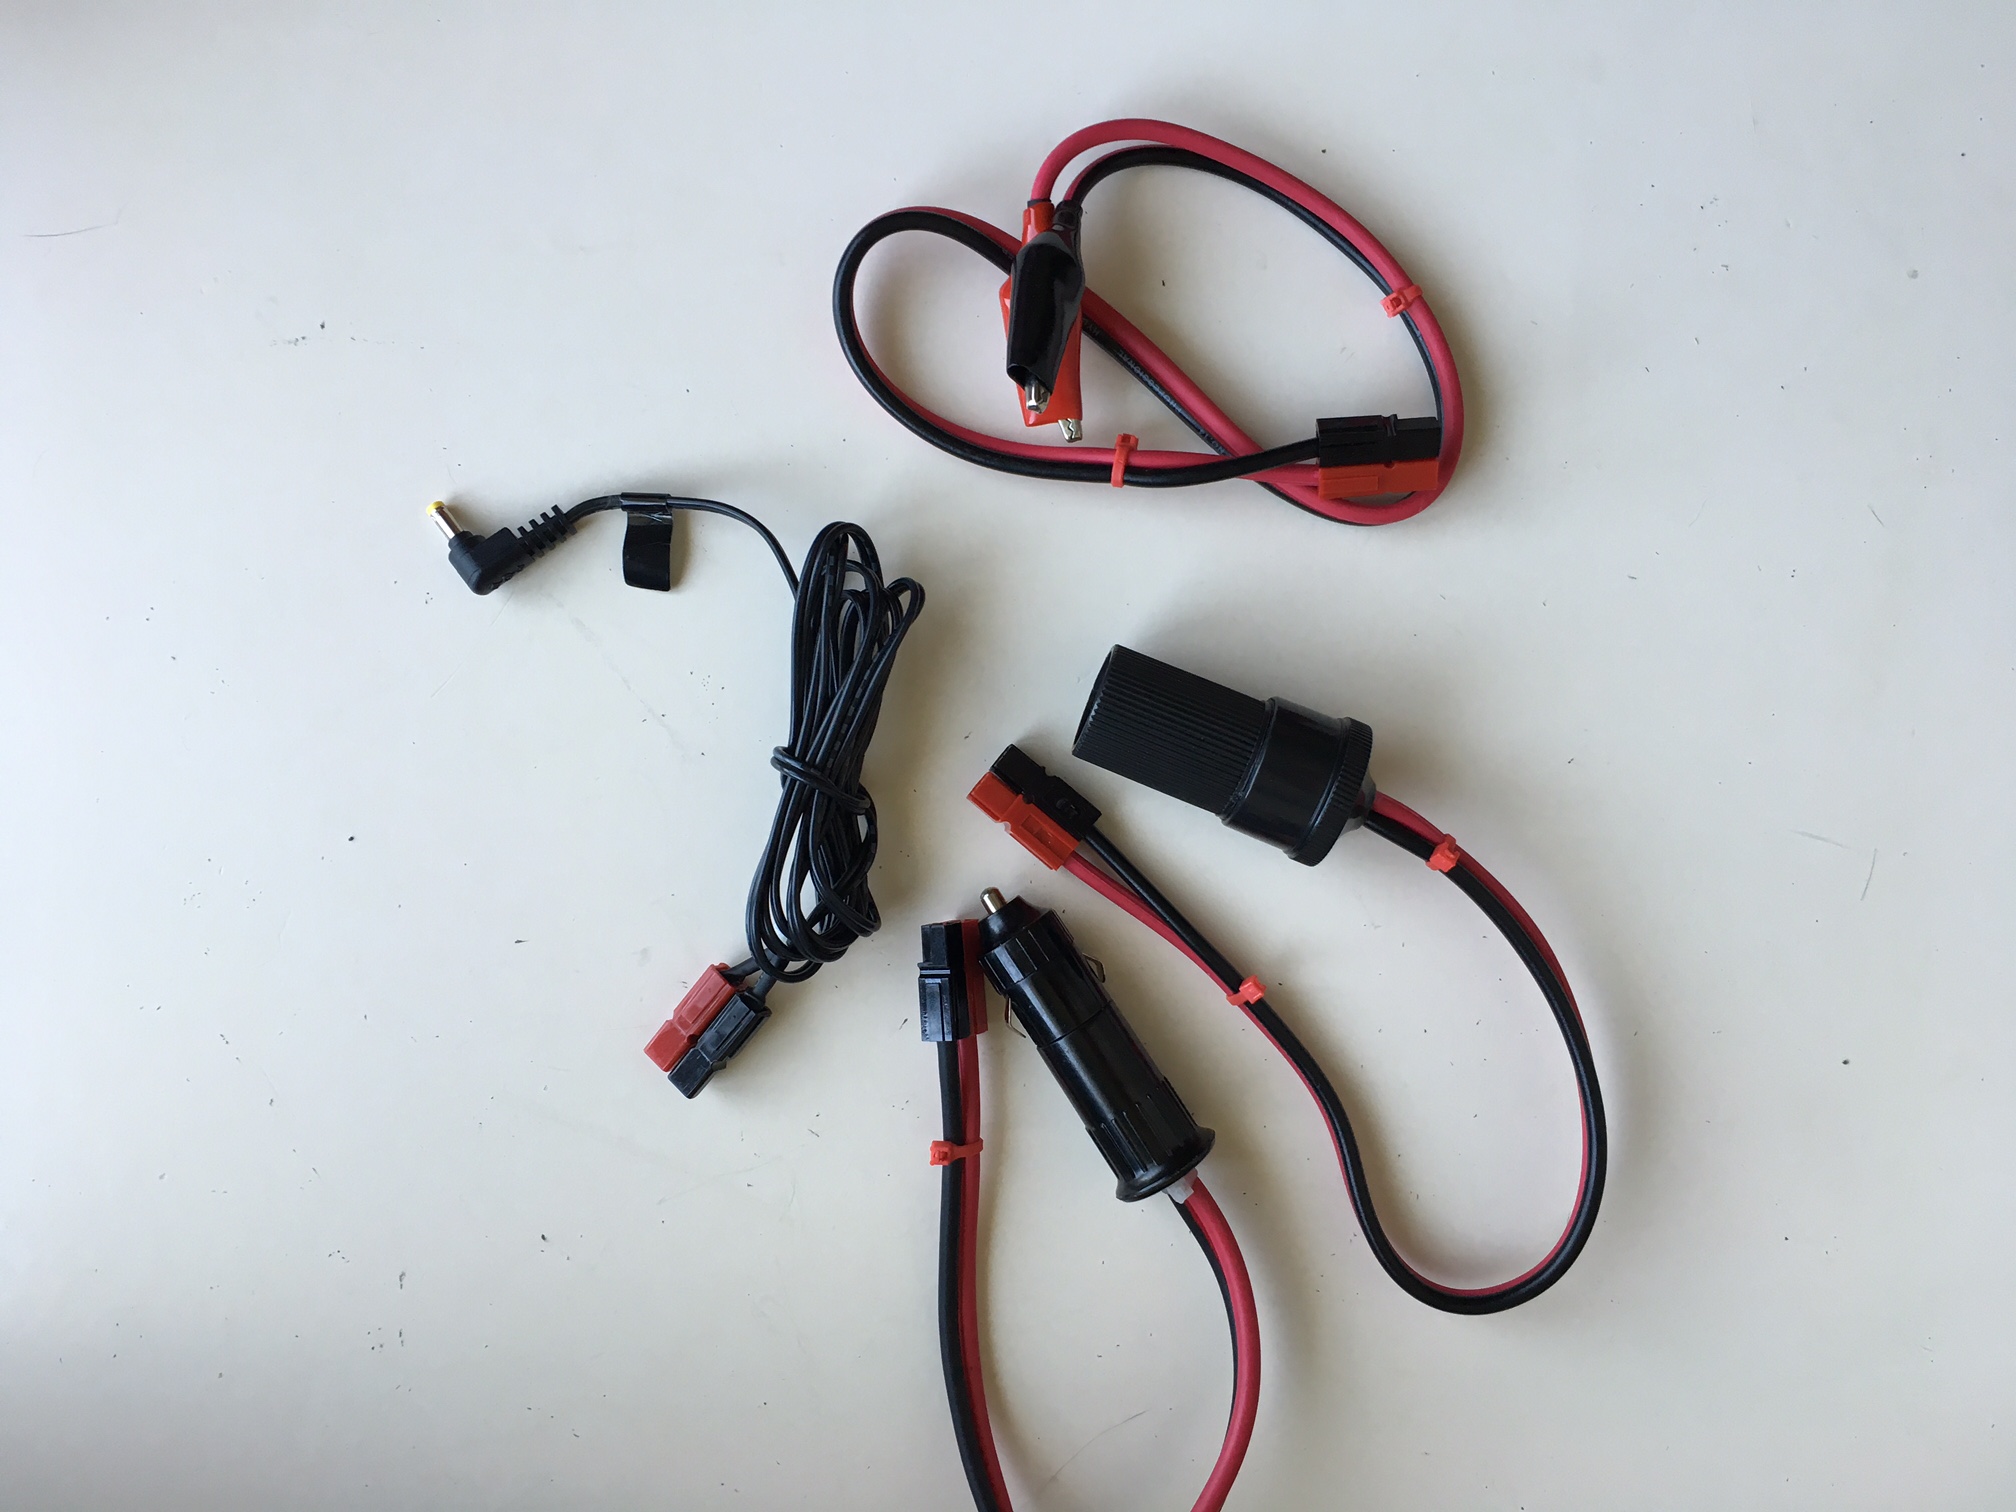
Photo 4. Off Grid Ham original photo ©2016
The Solar Upgrade Option.
Including a 5 or 10 watt solar panel will add $30-$50 to the cost of your DC power pack but it will give you a lot of energy independence. You could run a handheld, QRP HF rig, or reduced power mobile VHF radio almost indefinitely without any other energy source. No special changes or a charge controller are needed to add solar. Just plug the panel into one of the DC connection points and go.
What you need to know.
The Off Grid Ham Portable DC Power Pack offers a balance of power and portability for not a lot of money. I built mine with the upgraded Rig Runner and solar panel options and get excellent results with my FT-817 radio. This do it yourself DC power pack is a versatile tool that will greatly extend the off grid operating time on your handheld/QRP radio or other small electronics. The addition of a solar panel will allow you to run almost indefinitely without a traditional charging source.
nice work deconstructing the powerpack. Most similar presentatiosn are too complex for a beginner
I have seen other articles about DC power packs and many of them are excessively complex, or use expensive, hard to find parts. Let’s not make this harder than it needs to be; all this really involves is a battery in a box. There is no reason such a project should be difficult or costly. Thanks for your support, Mr. Greek. I really do try to make all my projects relatable to everyone.
Thanks again, Chris. More good information!
Pingback: Off Grid, On The Cheap. You Can Do This. - Off Grid Ham