If you have been running small solar panels or a kit system, all of the real work is done for you. Just plug in and go. But if you have any aspirations of upgrading to a more powerful or custom built solar energy system, you’ll need be familiar with MC4 connectors.
What is an MC4 connector?
MC4 stands for “Multi-Contact, 4 millimeter” and is a standard in the renewable energy industry. Most larger solar panels come with MC4 connectors already on them. It is a round plastic housing with a single conductor in a paired male/female configuration developed by the Multi-Contact Corporation. Multi-Contact is the official manufacturer of MC4 connectors. There are many other manufacturers producing clones (why this matters will be discussed later in this article).
The maximum current and voltage that can be pushed through MC4 connectors varies by application and the type of wire used. Suffice it to say that the margin of safety is quite large and more than adequate for any foreseeable project an amateur radio operator may undertake.
MC4 connectors terminate to each other with a notched interlock that in some situations requires a special tool to disconnect. The interlock prevents the cables from being unintentionally pulled apart. They are also weather resistant, UV proof, and designed for continuous outdoor use.
When and where MC4 connectors are used.
Small solar panels under 20 watts typically use screw/spring terminals or some type of automotive electrical connector. These panels do not produce high currents and are intended to be used as stand-alone units, so the method of termination is not really important.
Larger panels or panels that are designed to be wired together in an array need a standardized termination that can handle higher power levels. The MC4 connector fits the need perfectly. They are found on nearly every solar panel greater than 20 watts.
Some hams will cut the MC4 connectors off the solar panel and replace them with Anderson Power Poles. Do not do this! Power Poles are not designed for long term outdoor use, and you will have a solar panel that is not compatible with any other solar panel. If you insist on using Power Poles, make an adapter with an MC4 on one end and a Power Pole on the other.

Components of a male MC4 connector. OFF GRID HAM ORIGINAL PHOTO ©2016
The anatomy of MC4 connectors.
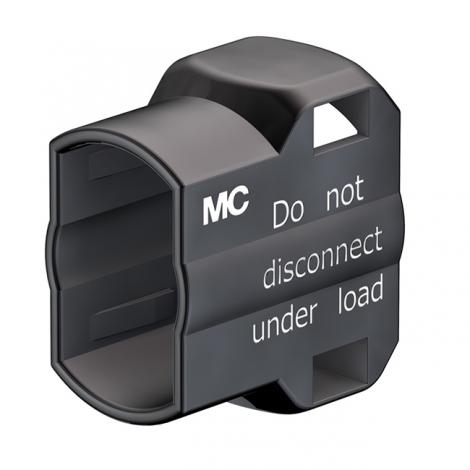
MC4 removable safety clip. PHOTO COURTESY MULTI-CONTACT CORP.
There are five parts to an MC4 connector (from right to left in the photo above): the main housing, a metal crimp contact, a rubber water seal, a seal retainer, and a screw on end cap. The male version uses a different housing and metal contact, but the rest of the parts are interchangeable. To disconnect, squeeze the two interlocks together and pull the connectors apart.
Some versions of MC4 have a removable “safety lock clip” that covers the interlock tabs and provides additional unintentional disconnect protection. Connectors using these clips cannot be squeezed apart by hand; you must release them with the disconnect tool.
Tools for MC4 connectors.
Working with MC4 connectors requires a few specialized tools. Many on line retailers sell kits that usually include a lot of extras you may not need or want. The only must-haves for installing MC4 connectors is a crimp tool and two disconnect/spanner wrench combo tools.
MC4 connector crimp tools vary widely in price, from less than $20 up to several hundred dollars. There are plenty of good ones in the $30-$60 range. The exact make and model is not important as long as it has a hinged, swing out contact holder. This will help make your terminations uniform and on spec. Some of the lower priced crimp tools do not have this feature and should be avoided.
In addition to the crimp tool you will also need two disconnect/spanner wrench combo tools. They are made of plastic and easy to find for less than $10 for a pair.
Choosing wire for your MC4 connectors.
Stranded 10 gauge wire that meets National Electric Code (NEC), Article 690, USE-2 for photovoltaic applications, and Underwriter’s Laboratory (UL) standards for UV resistance and insulation thermal tolerance is acceptable. PV wire comes in red and black and will last many years in an outdoor environment but is considerably more expensive than standard copper wire. Ordinary 10 gauge wire is electrically identical to NEC approved PV wire and will technically work but is not UV resistant and not approved for outdoor use.
HINT: Don’t make this harder than it has to be. You do not need to spend endless hours of research to find the correct wire. Most of what is offered for sale as “solar panel wire,” “photovoltaic wire,” or similar nomenclature already meets NEC requirements and will work just fine.
The National Electric Code Article 690 addresses every aspect of solar power systems (link provided at the end of this article).
MC4 connector clones.
There are a lot of “MC4-compatible” connectors on the market that are not made by Multi-Contact. In fact, as I browse the internet I find that most of what’s out there are imitations. These knockoffs do not meet the same safety certifications and engineering standards authentic MC4 connectors.
It’s become enough of a problem that Multi-Contact has issued this formal statement.
HINT: Multi-Contact offers the safety clip only as an add on accessory and does not make MC4 connectors with one integrated into the main housing. Therefore, if you see an MC4 with a safety clip that is not removable (i.e., molded into the connector as one solid piece) then it is definitely a fake. Counterfeit MC4 connectors with no safety clip are harder to identify.
I cannot ethically or legally tell you it’s OK to use the fakes. The price discount for using them is typically less than $0.30 per connector, so unless you’re buying in bulk, cutting corners will not save you any real money. Read Multi-Contact’s statement and come to your own conclusions.
Assembling the MC4 connector.
Making an MC4 cable is super-easy if you follow these steps:
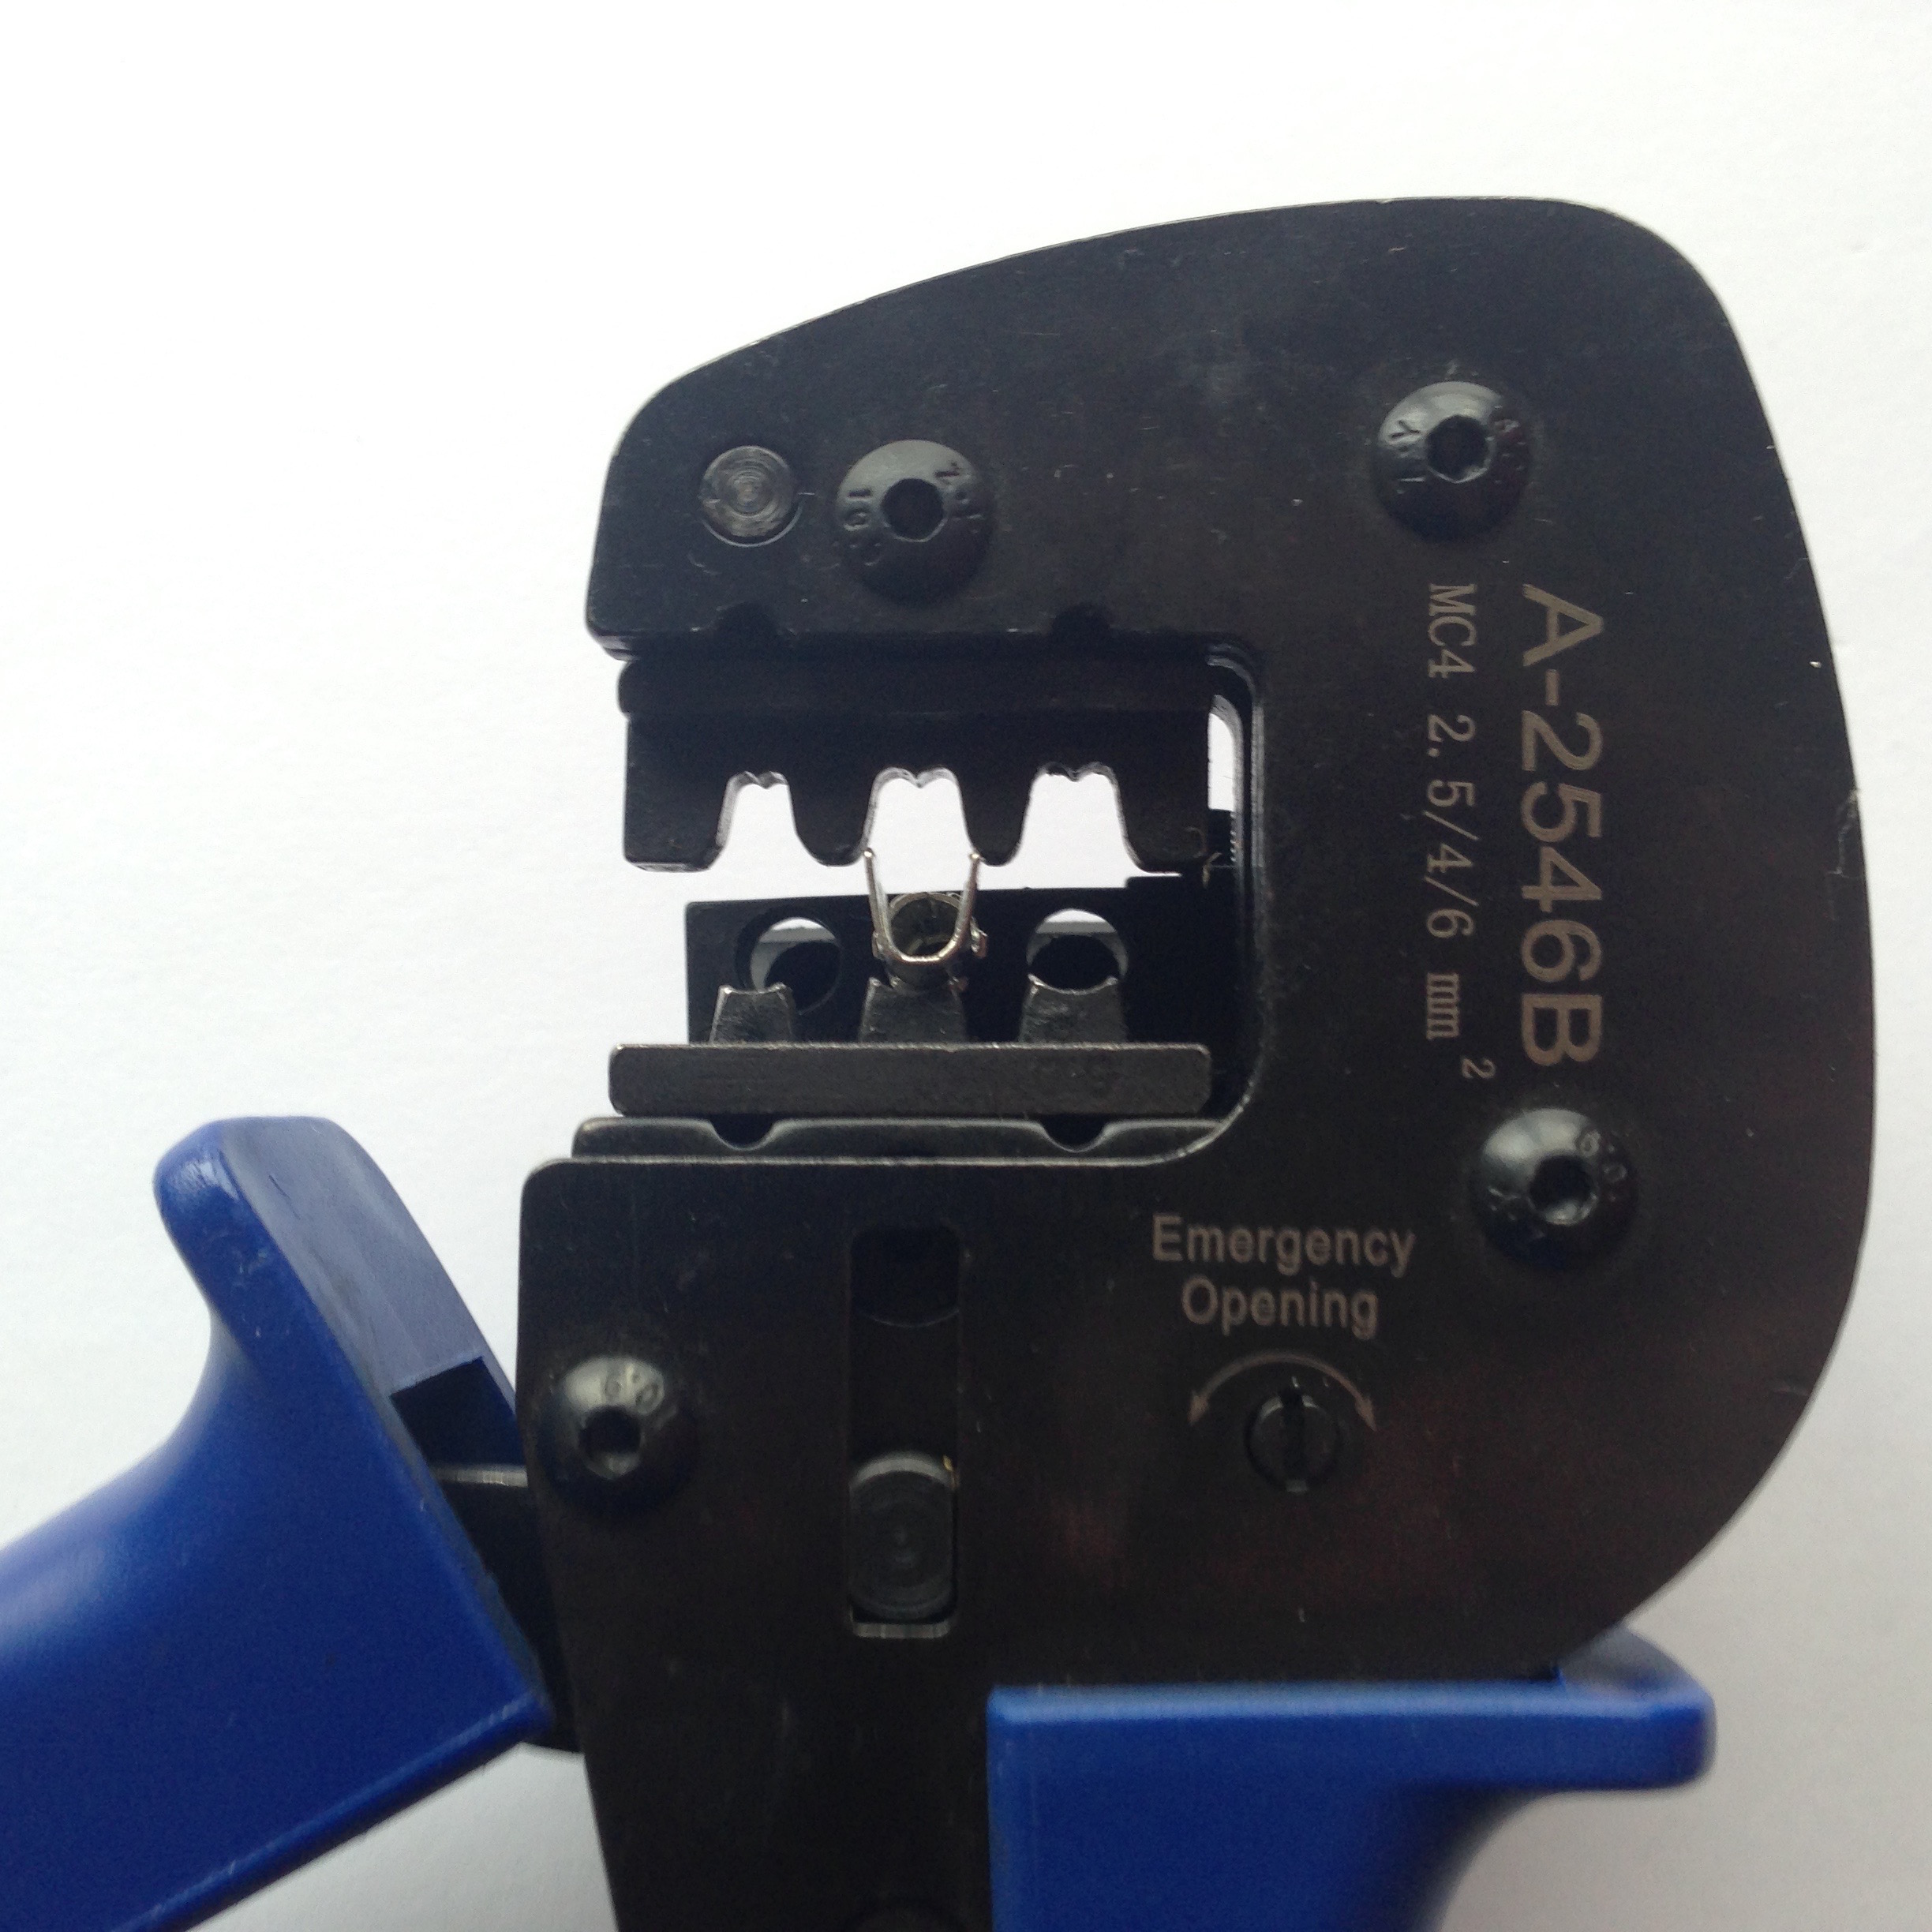
PHOTO 1. OFF GRID HAM ORIGINAL PHOTO ©2016
Place the metal contact into the crimp tool. Important: The contact should face straight up like the letter U as shown in photo 1 above. Insert the stripped wire firmly in the contact. Sometimes it is easier to place the contact on the wire first, then align it in the crimper. It does not matter as long as the contact remains in an upright position. Slowly squeeze the crimp tool until one or two ratchets click and the tool holds its position. Check to make sure the contact is still properly aligned. If everything looks good, squeeze the crimp tool all the way down until it releases.

Photo 2. OFF GRID HAM ORIGINAL PHOTO ©2016
You should have a uniform, tight folded crimp as shown in photo 2 above. If any part of the contact surface is not cleanly folded over, don’t worry. Put it back in the crimp tool and do it again.
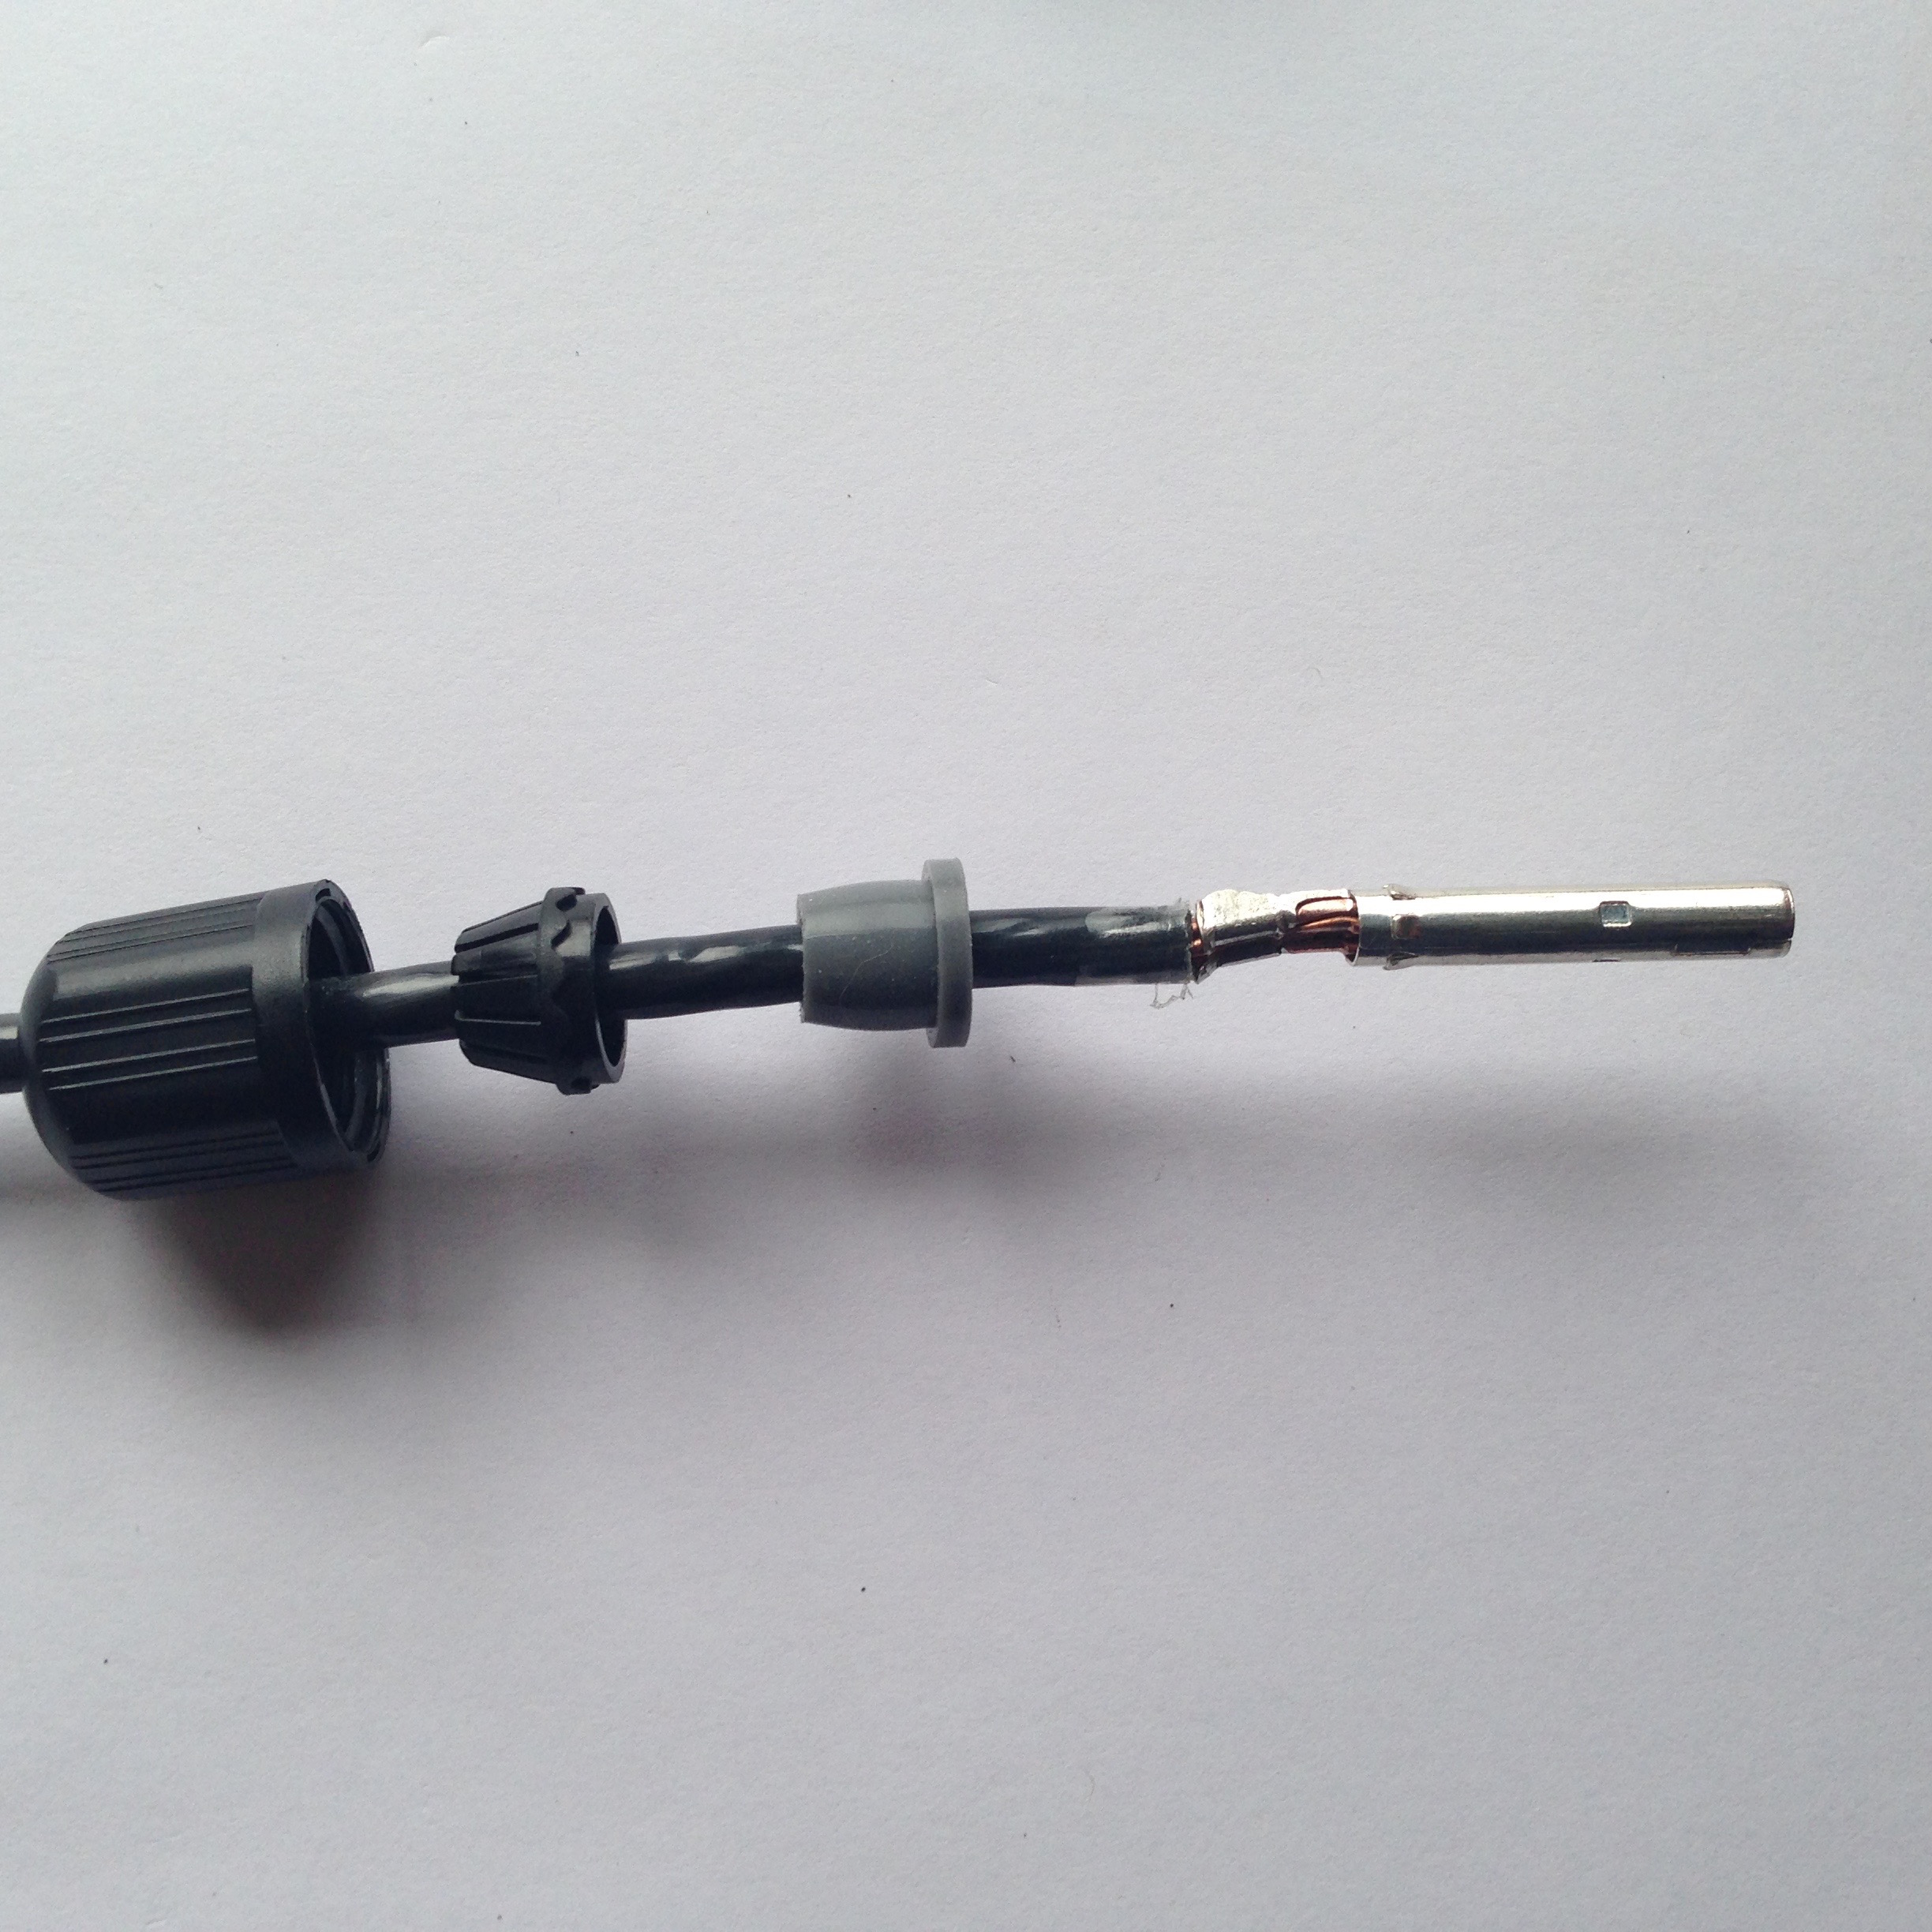
Photo 3. OFF GRID HAM ORIGINAL PHOTO ©2016
Slip the end cap, seal retainer, and seal over the contact as shown in photo 3.
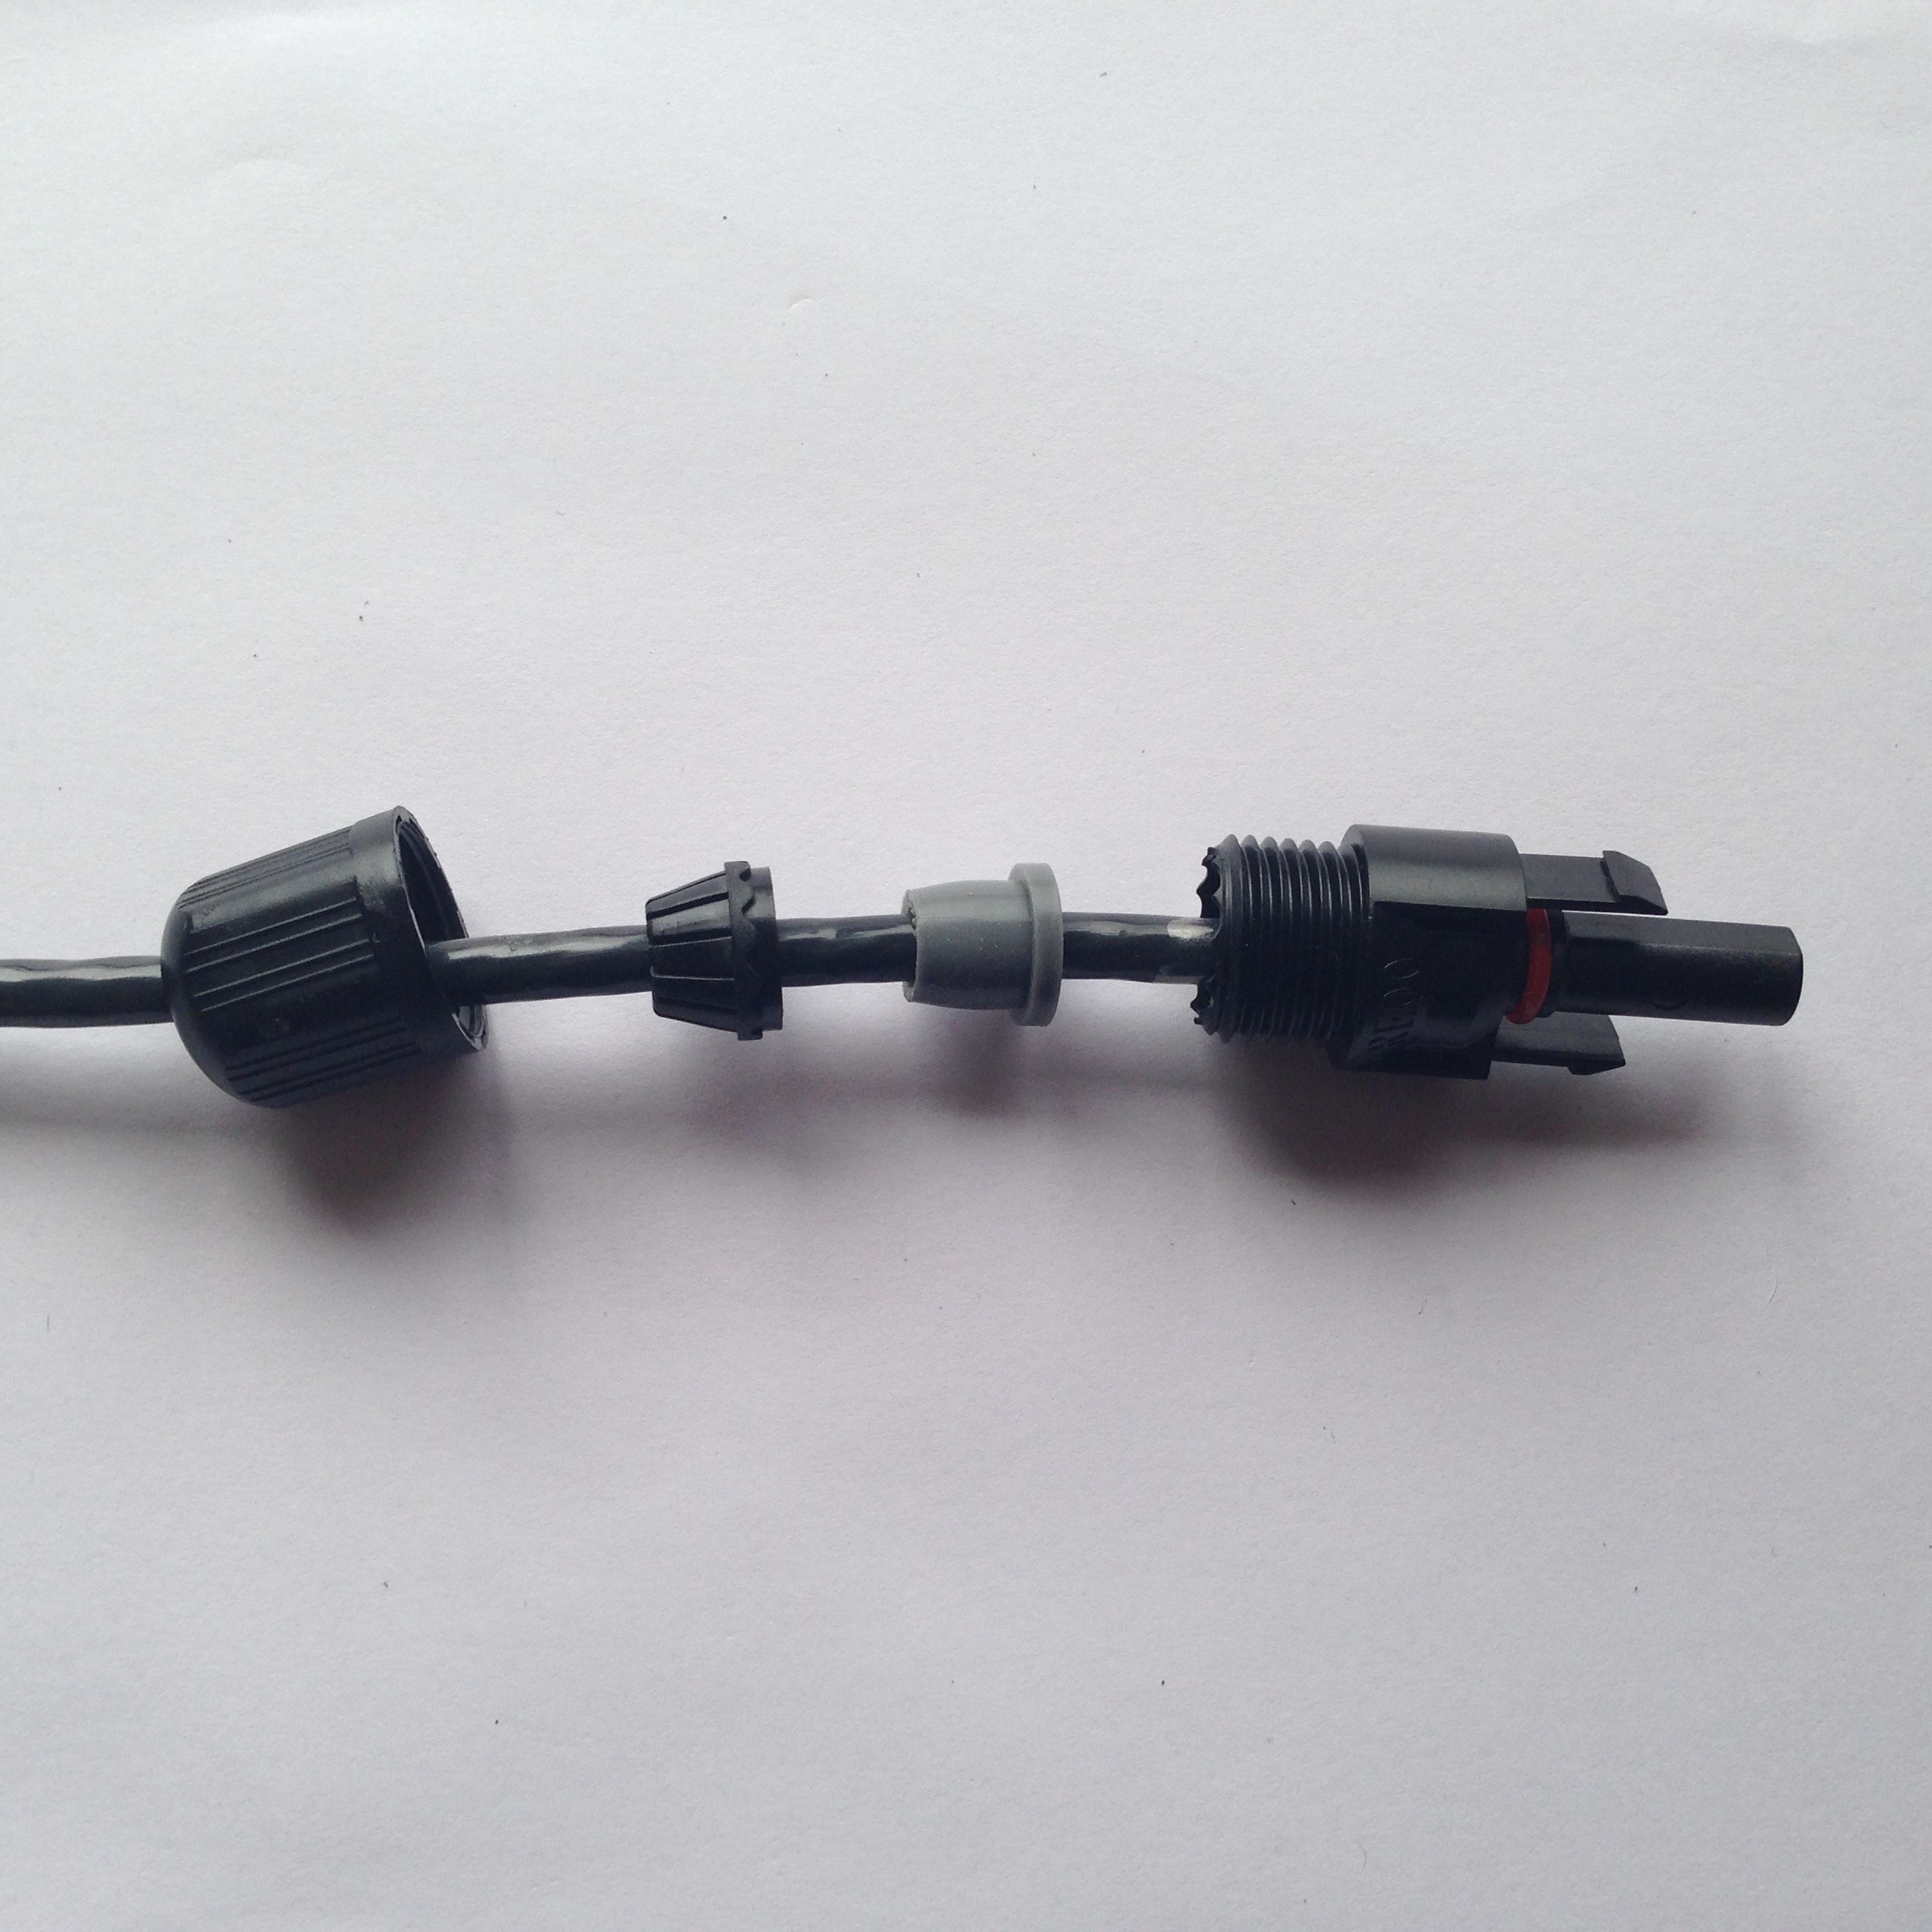
Photo 4. OFF GRID HAM ORIGINAL PHOTO ©2016
Insert the connector into the housing and push firmly until it locks in place (photo 4). The contact has a barb and once inserted cannot be removed. You have only one shot at this.
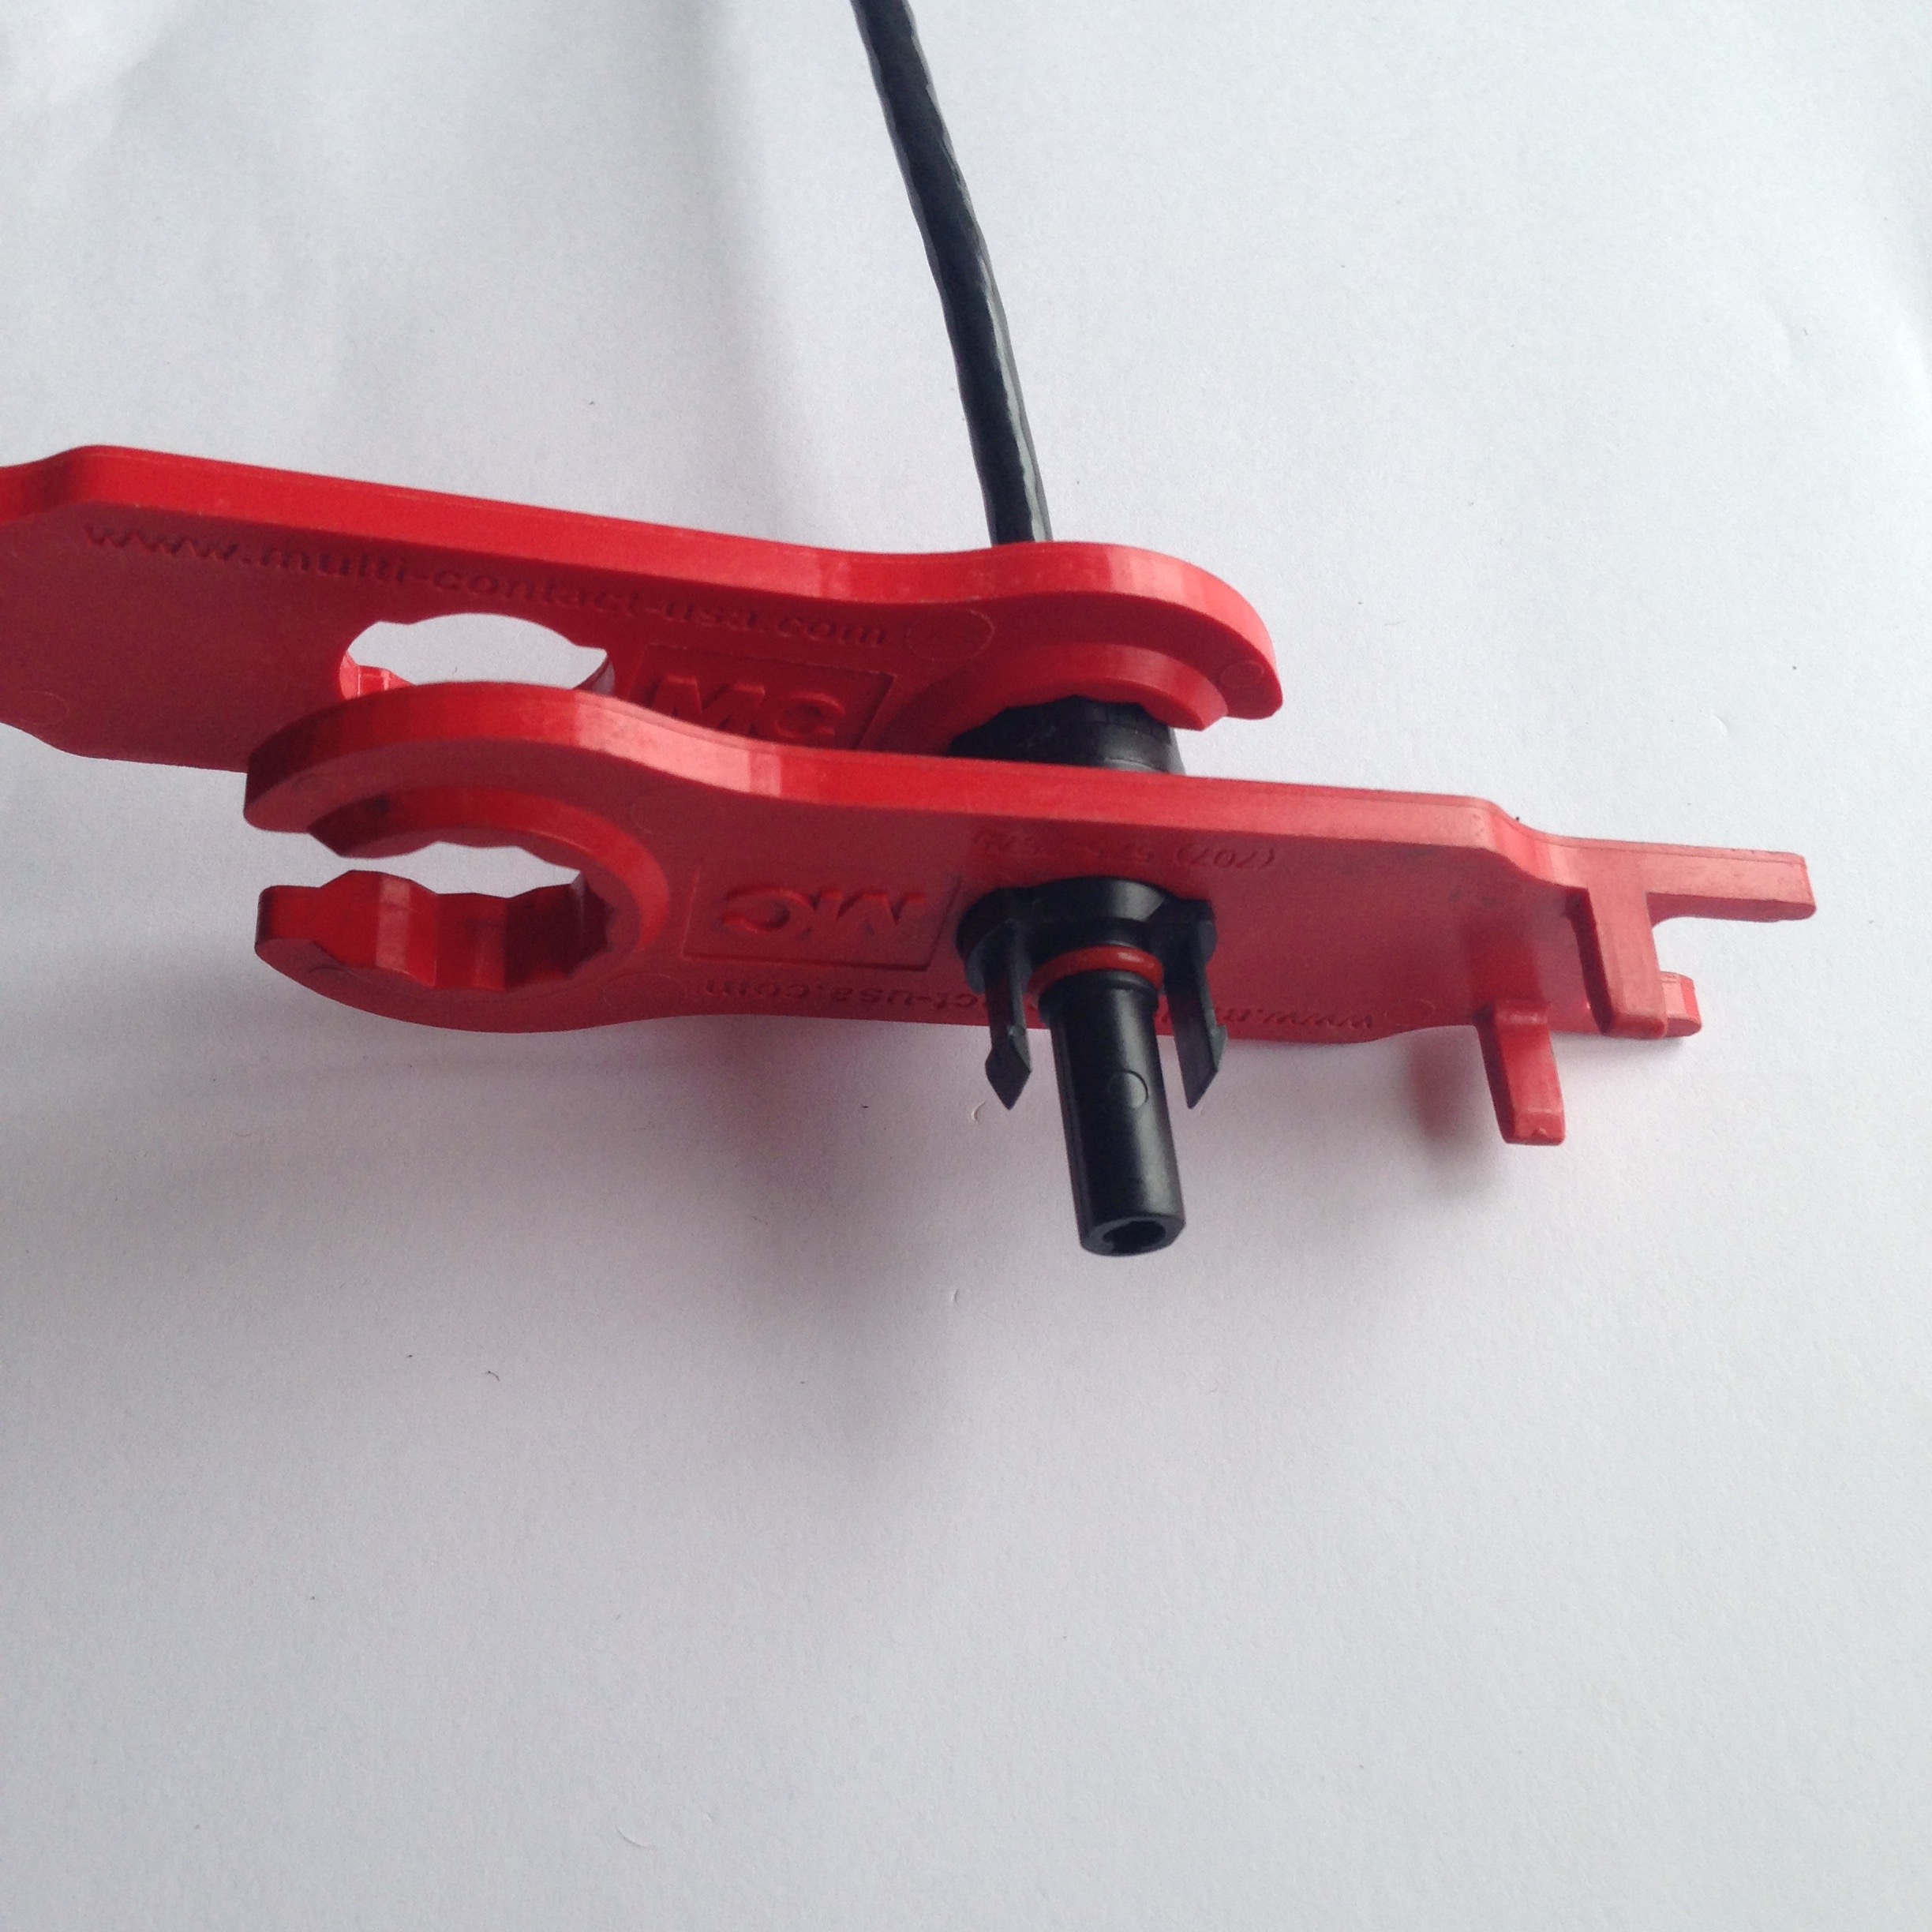
Photo 5. OFF GRID HAM ORIGINAL PHOTO ©2016
Collapse the entire assembly into the housing. You will notice that there are little “teeth” molded into the seal retainer. Match these up with the molded teeth on the main housing. Hand-tighten everything, then finish the job with your MC4 disconnect/spanner wrenches (photo 5). If you are really picky, Multi-Contact sells a torque wrench designed specifically for MC4 connectors to tighten them to the exact engineering spec.

Photo 6. OFF GRID HAM ORIGINAL PHOTO ©2016
The finished product should look like photo 6: Clean, tight and ready to go. The process for male MC4 connectors is the same but be sure to use the correct contact.
Shortcut method:
Instead of taking the connector apart, crimp the contact as described above. Then, loosen the end cap but do not completely remove it. Shove the crimped connector through the entire assembly until it locks in place, secure the end cap back down, and tighten it with the wrenches.
Either method is acceptable. The shortcut method avoids the possibility of dropping the small parts while working on a roof.
Male and female connector biology lesson.
Identifying a connector as male or female is usually intuitive, but with MC4 it’s a bit misleading.
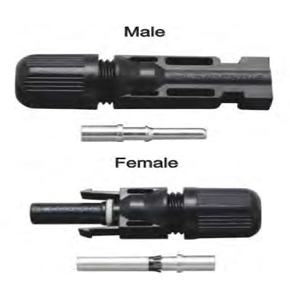
PHOTO COURTESY HISSOLARENERGY.COM
The connector that appears to be male (by virtue of its appearance and how it fits into its mating plug) is actually the “female” connector. And of course that means what would seem to be the male version is actually female. The male/female designation refers to the metal contacts inside each plug, not the plastic enclosure. I know it seems backwards, but that’s how they roll.
There is no formal standard as to which gender is positive and which is negative, but in most cases the female plug is positive.
MC4 branch combiner connectors.
Connecting several panels into one common feed is easy with combiners. All you need to do is plug two or more panels in one side, and your single lead comes out the other. Photo 7 below shows a simple 2-into-1 combiner.
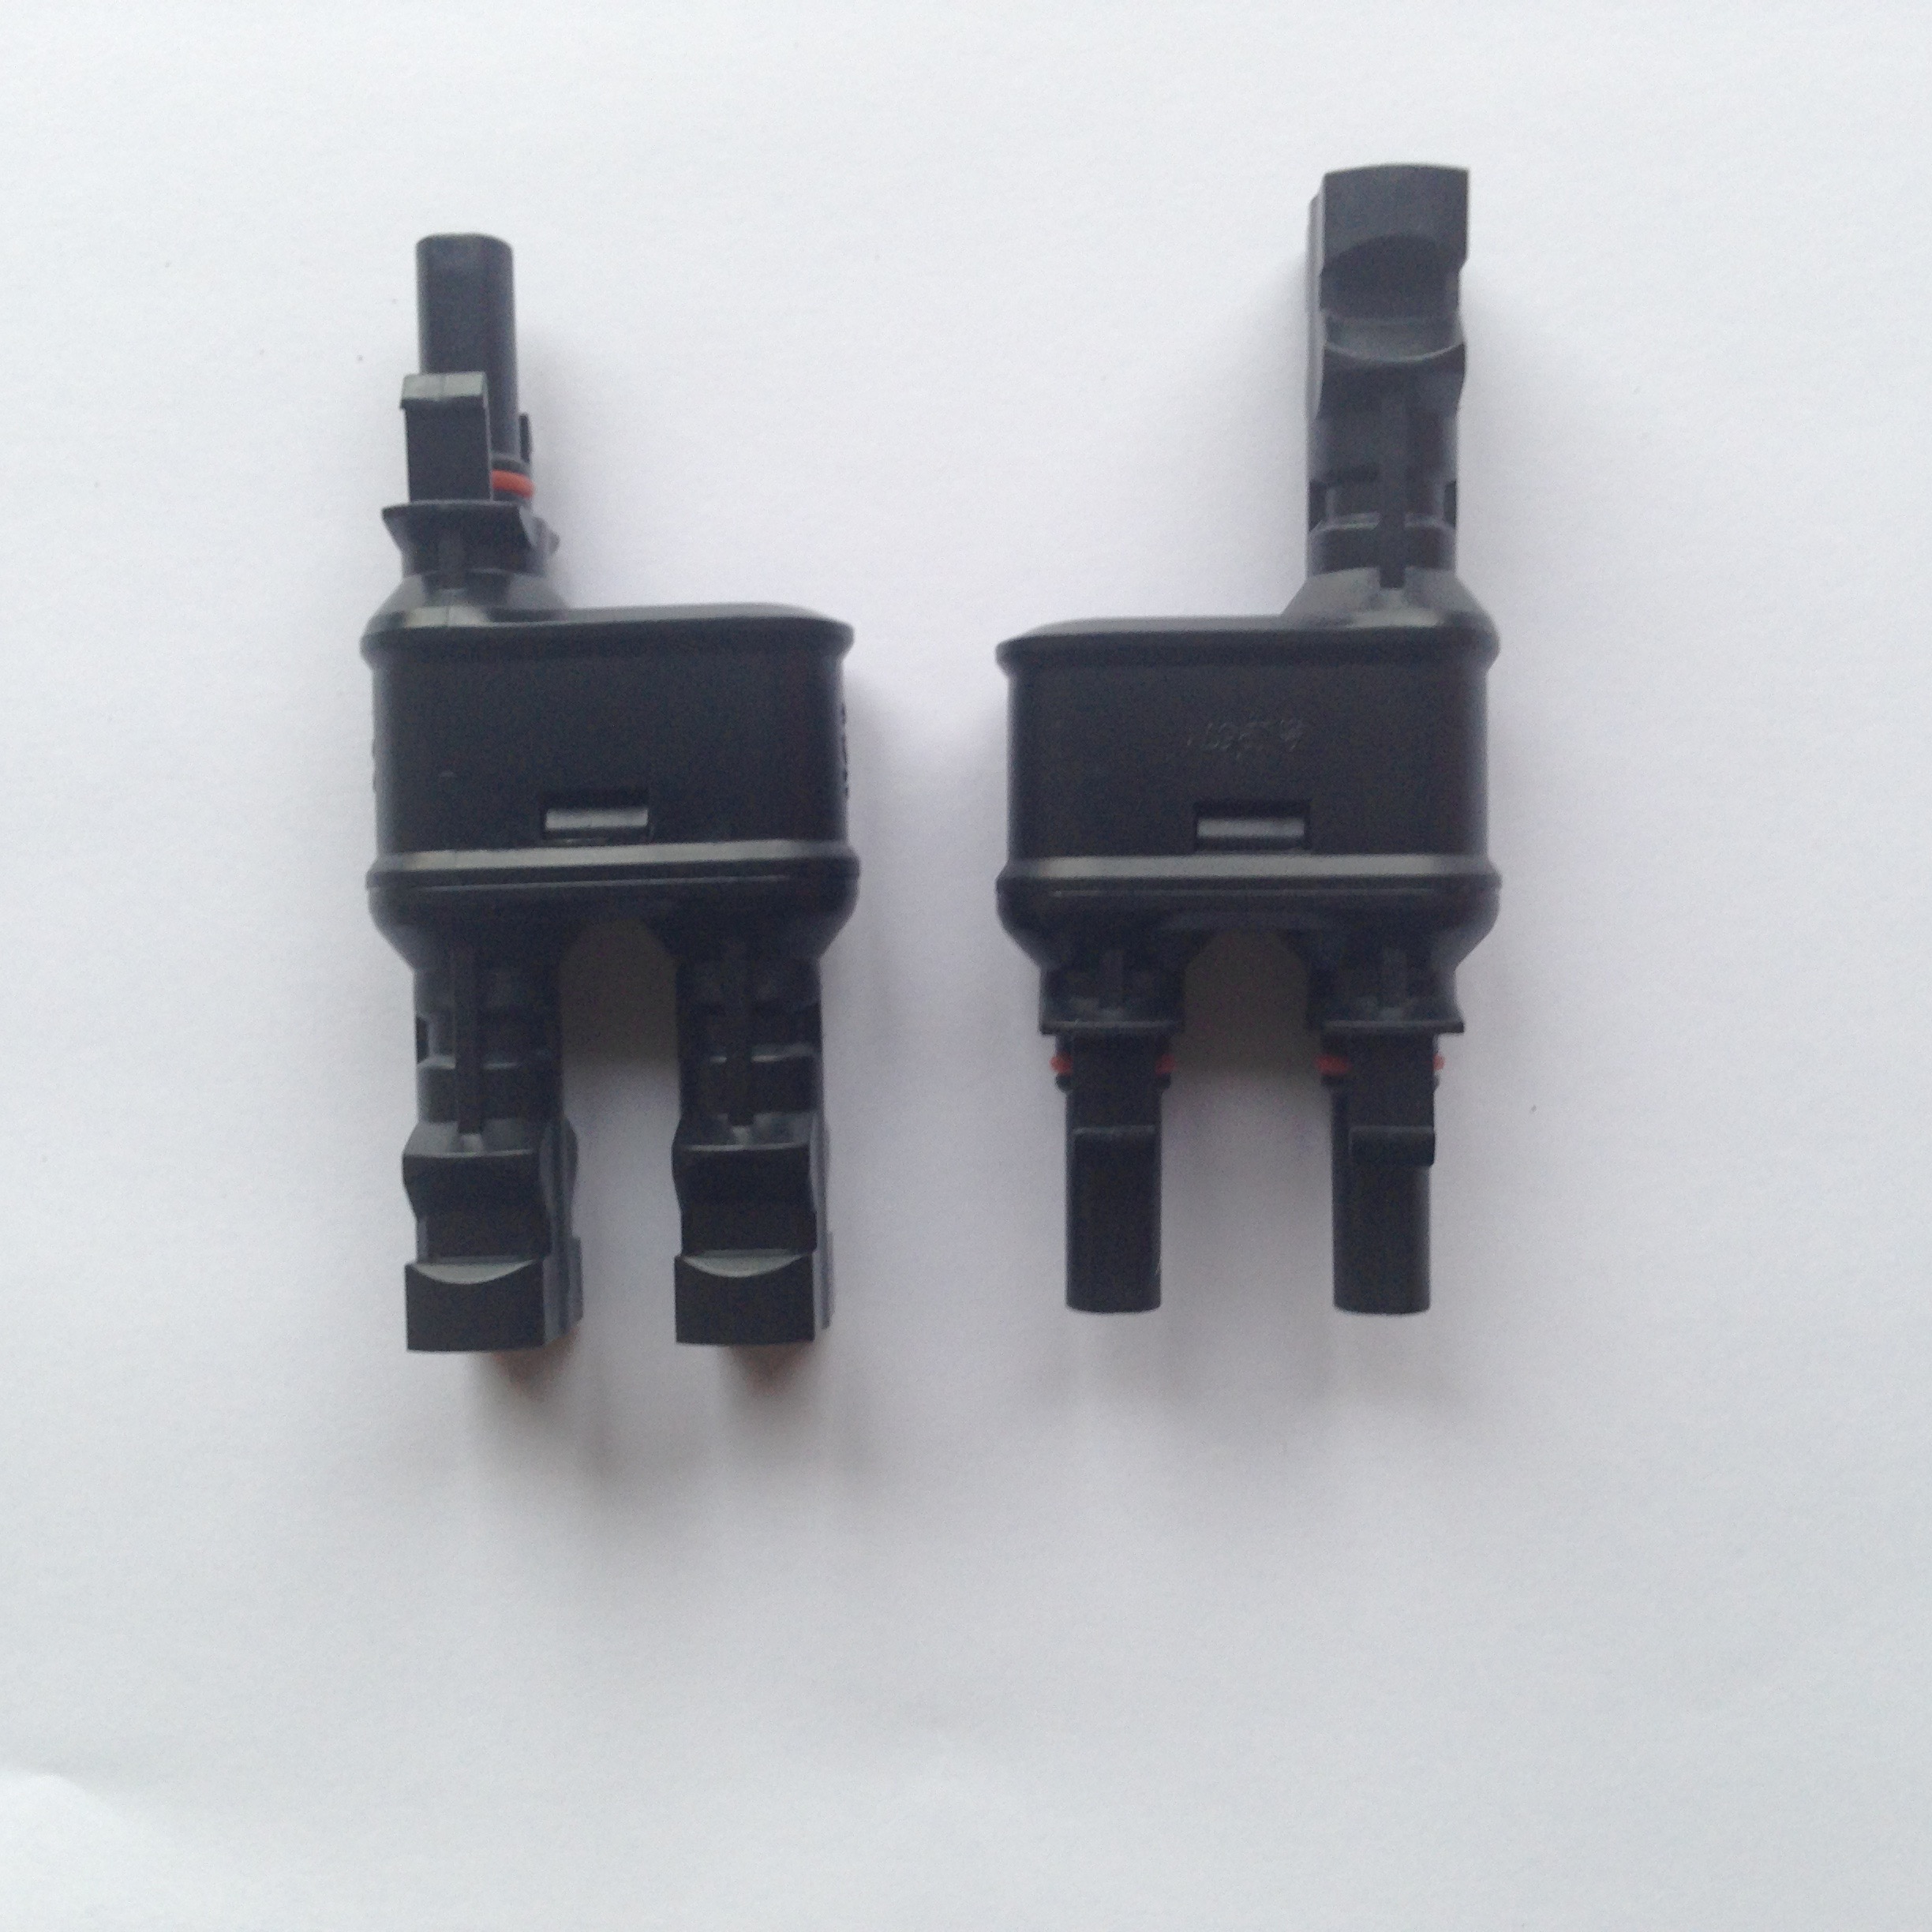
Photo 7. OFF GRID HAM ORIGINAL PHOTO ©2016
There are combiners that can go to four inputs. It is ok to stick two or more combiners together to create more branches as long as you do not exceed the voltage & current limits of the devices. A resourceful radio amateur can easily make their own combiners. As with the single MC4 connectors, combiners come in male and female versions and there are a lot of aftermarket knockoffs that may not be as good as the original.
Resources.
Multi-Contact Corporation’s website has a wealth of information about MC4 connectors including diagrams, data sheets, application information, and accessory catalogs.
This PDF from North Carolina State University gives a great summary of National Electric Code Article 690 covering photovoltaic systems.
The National Fire Protection Association administers the National Electric Code. You can read the actual text of the NEC at this link (registration required). Geek warning: The full NEC is nearly a thousand pages long. There is way more here than the average radio amateur will ever want or need to know!
What you need to know.
Anyone serious about off grid energy must master MC4 connectors. Luckily, it is a fairly easy skill to learn. With the correct tools and a little practice, you should be able to assemble an MC4 cable to custom fit any application. Pre made MC4 cables are available, but making your own saves money and gives you exactly what you need.
As far as I can tell, these connectors Can be assembled withut crimping but with solder. Isn’t it so?
BTW, thumbs up for this blog!
I have never tried soldering them, but I don’t see why it would not work. Soldering might be a problem if you are working on a roof or in an area where it would be hard to use a soldering iron.
We are mainly using the Weidmuller MC4 connectors with push in technology (Spring cage). Much faster installations and very reliable! Would recommend to anyone installing PV systems!
http://www.weidmueller.com/int/products/connectivity/photovoltaic-connectors/photovoltaic-connector-pv-stick
I’m not sure if this comment is spam or a serious reply, but I’m letting it through anyway since it is relevant to what we do here at Off Grid Ham. I have not used this product and know nothing about it. If I can find out more, I’ll pass it along.
Absolutely not Spam. Our company, Kraftpojkarna, is Swedens biggest distributor of PV equipment and we are not in any way related to the german company Weidmuller, except for selling and market their MC4 products (Among others). The lionshare of our re-sellers prefer these “push-in” MC4 connectors because of ease of use and the seemingly good reliability. We do have some customers who certainly refuse to use anything other than the original Multi Contact MC4 connectors though. I cant say for sure which connector is the most reliable in the long run, but the Weidmuller connector definitely is much quicker to use and install.
Am I correct that MC4 connectors cannot be removed/reused? That is, if I need to shorten the wire or remove the connector to run through a bulkhead, then I assume I need snip the connector off, and install a new one (or a new metal contact at the very least). Yes? Thanks, and great write-up.
Hi James, you are for the most part correct. MC4 connectors are basically a one-shot deal. The metal contact is crimped on and has barbs that engage and hold it in the plastic housing. You can reuse anything that does not get trashed when you pull it apart, but it’s wishful thinking. If you must recycle an MC4, a better way is to cut the wire so that several inches or more are still left on the connector, then splice it back into whatever the new situation will be. This leaves the the connector assembly intact. It’s still a far less than awesome arrangement, but it will work if you have no other options. The best path is to order way more connectors than you think you will need to allow for screw-ups. Thanks for stopping by Off Grid Ham, I hope you’ll become a regular and invite all your friends. 73.
Thanks so much for the reply, Chris. I think you’re right, that replacing rather than re-using is the proper solution. After all, they’re cheap! I just ordered some.
I’m actually not a radio operator, but stumbled upon your site when googling MC4 connectors for the solar panel I’m installing on my VW camper van. But I’ve already bookmarked your site and will pop back in whenever I need to do more solar / off grid research!
Thanks again!
Very cool! Everyone is welcome here!
Thanks for the welcome! Actually I have another quick question that maybe you can offer some advice on…
So this panel I’m mounting will be on the roof of my VW camper van. The factory wires on the panel are excessively long and would require some less-than-tidy looping to take up the slack before entering through the roof in my van (not the end of the world, but not ideal). I’m assuming I’d be voiding the warranty by snipping the wires… But from your experience, is that common practice – to cut the factory wires? Or is that a mjaor no-no?
So ideally, I would cut them to a more manageable length and install new MC4s. And I’m thinking the MC4 connection point would remain on the EXTERIOR of the van so that they could be disconnected easily, should I need to remove the panel. (If I make the connection in the interior, the large size of the connectors would require a very large hole through roof, or a small hole, but then I’d have to snip the wire if I ever want to remove the panel).
Sorry for the tangent, but if you have any thoughts, I’d love to hear!
Hello again…I don’t think simply cutting a wire will void the warranty for the panel, but I’m not the arbiter of these things. It is not common to need to cut the factory wires because I’ve never come across any that were more than a foot or to long, so you have an unusual situation. Use your own judgement, but if it were my panel I would cut the wires down to a manageable size.